Repoussé IX: Repoussé Hammers, Repoussé Hammer Patterns, and How to Make Them
This is a continuation of the writings of French repoussé master Nahum Hersom. All text that I have transcribed is as how he wrote it. ((My edits are in double parenthesis.))
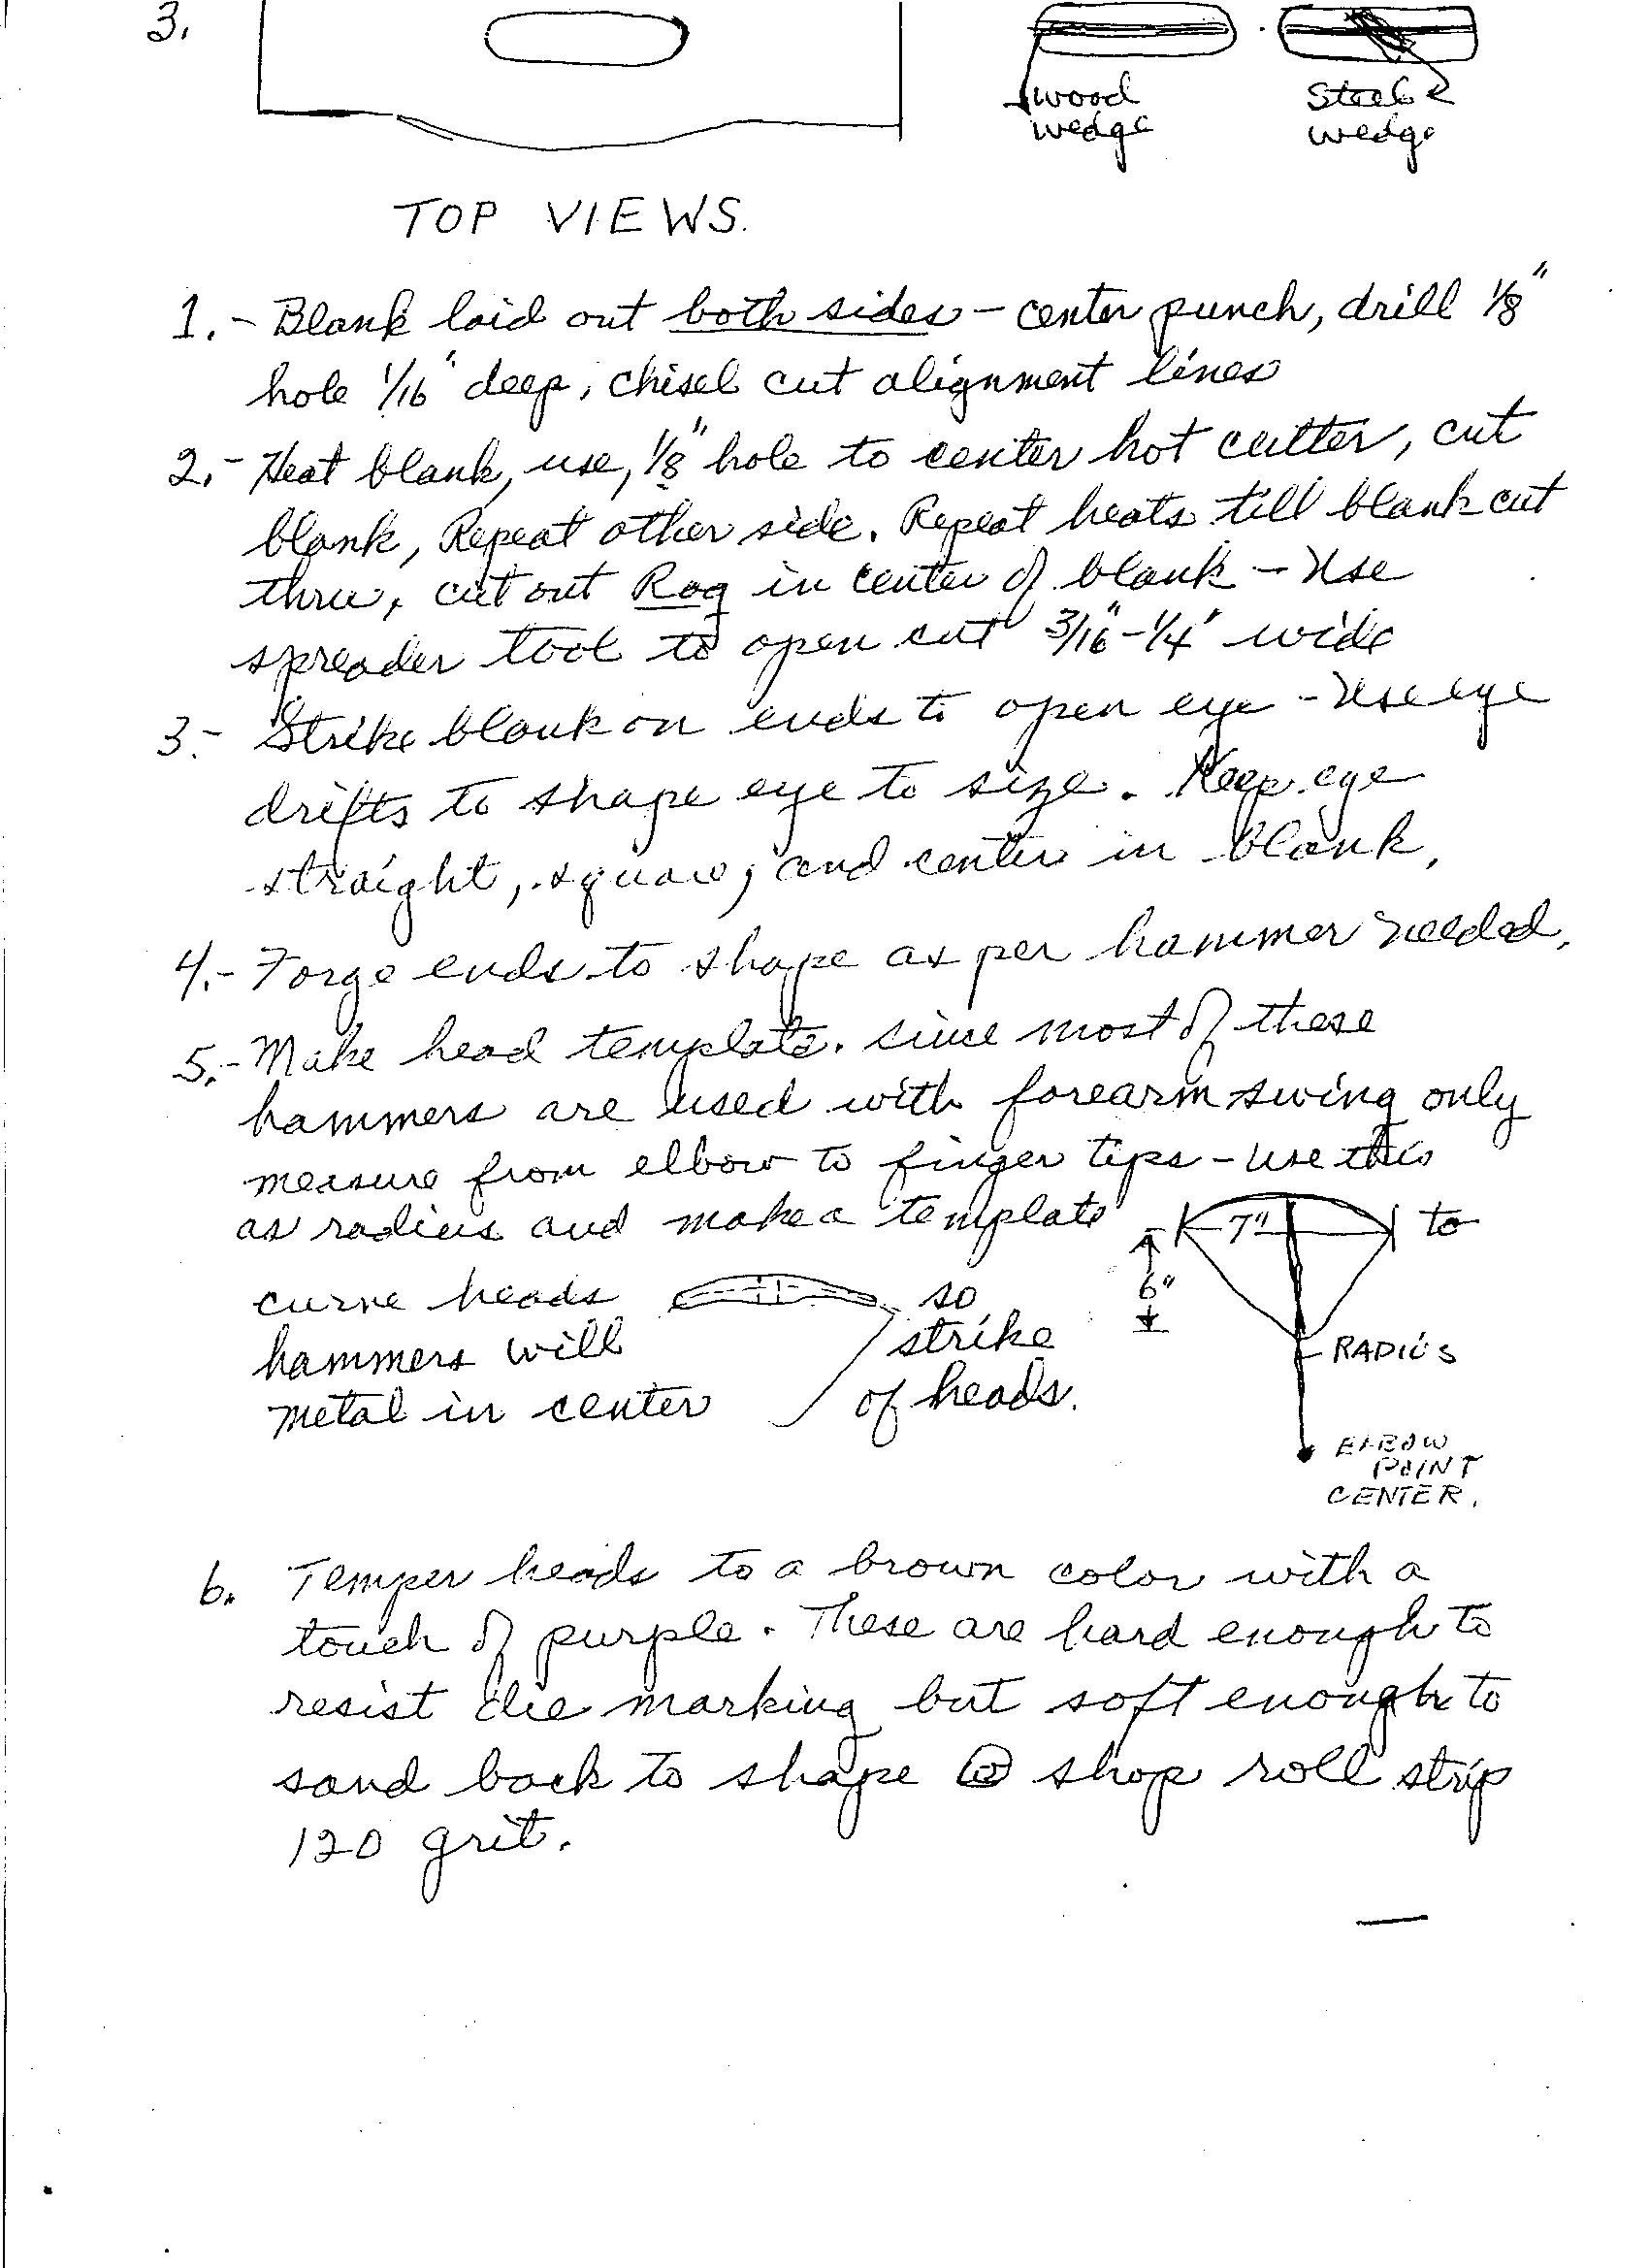
In this section on hammers, much of what Nahum wrote was by hand, accompanied by sketches. I chose to scan and publish these pages, rather than try to re-write, as seeing exactly how he presented these teachings might just endear you to him somewhat…as a grandpa might endear his grandchildren. The last section is transcribed, as you will see.
Since Nahum wrote these out on 11-1/2 x 17″ paper, I have split these pages in two, as my scanner only handles 8-1/2 x 11″ sheets; i.e. 1A and 1B, 2A and 2B, and so on.
If you wish to see a larger image, simply click on the image. You may also download the image and print it out for better reading.
Scanned Pages of Nahum Hersom’s
Repoussé Hammers, Hammer Patterns and How to Make Them


((These next two pages might be a bit redundant, but they also contain more info.))

((The following is transcribed))
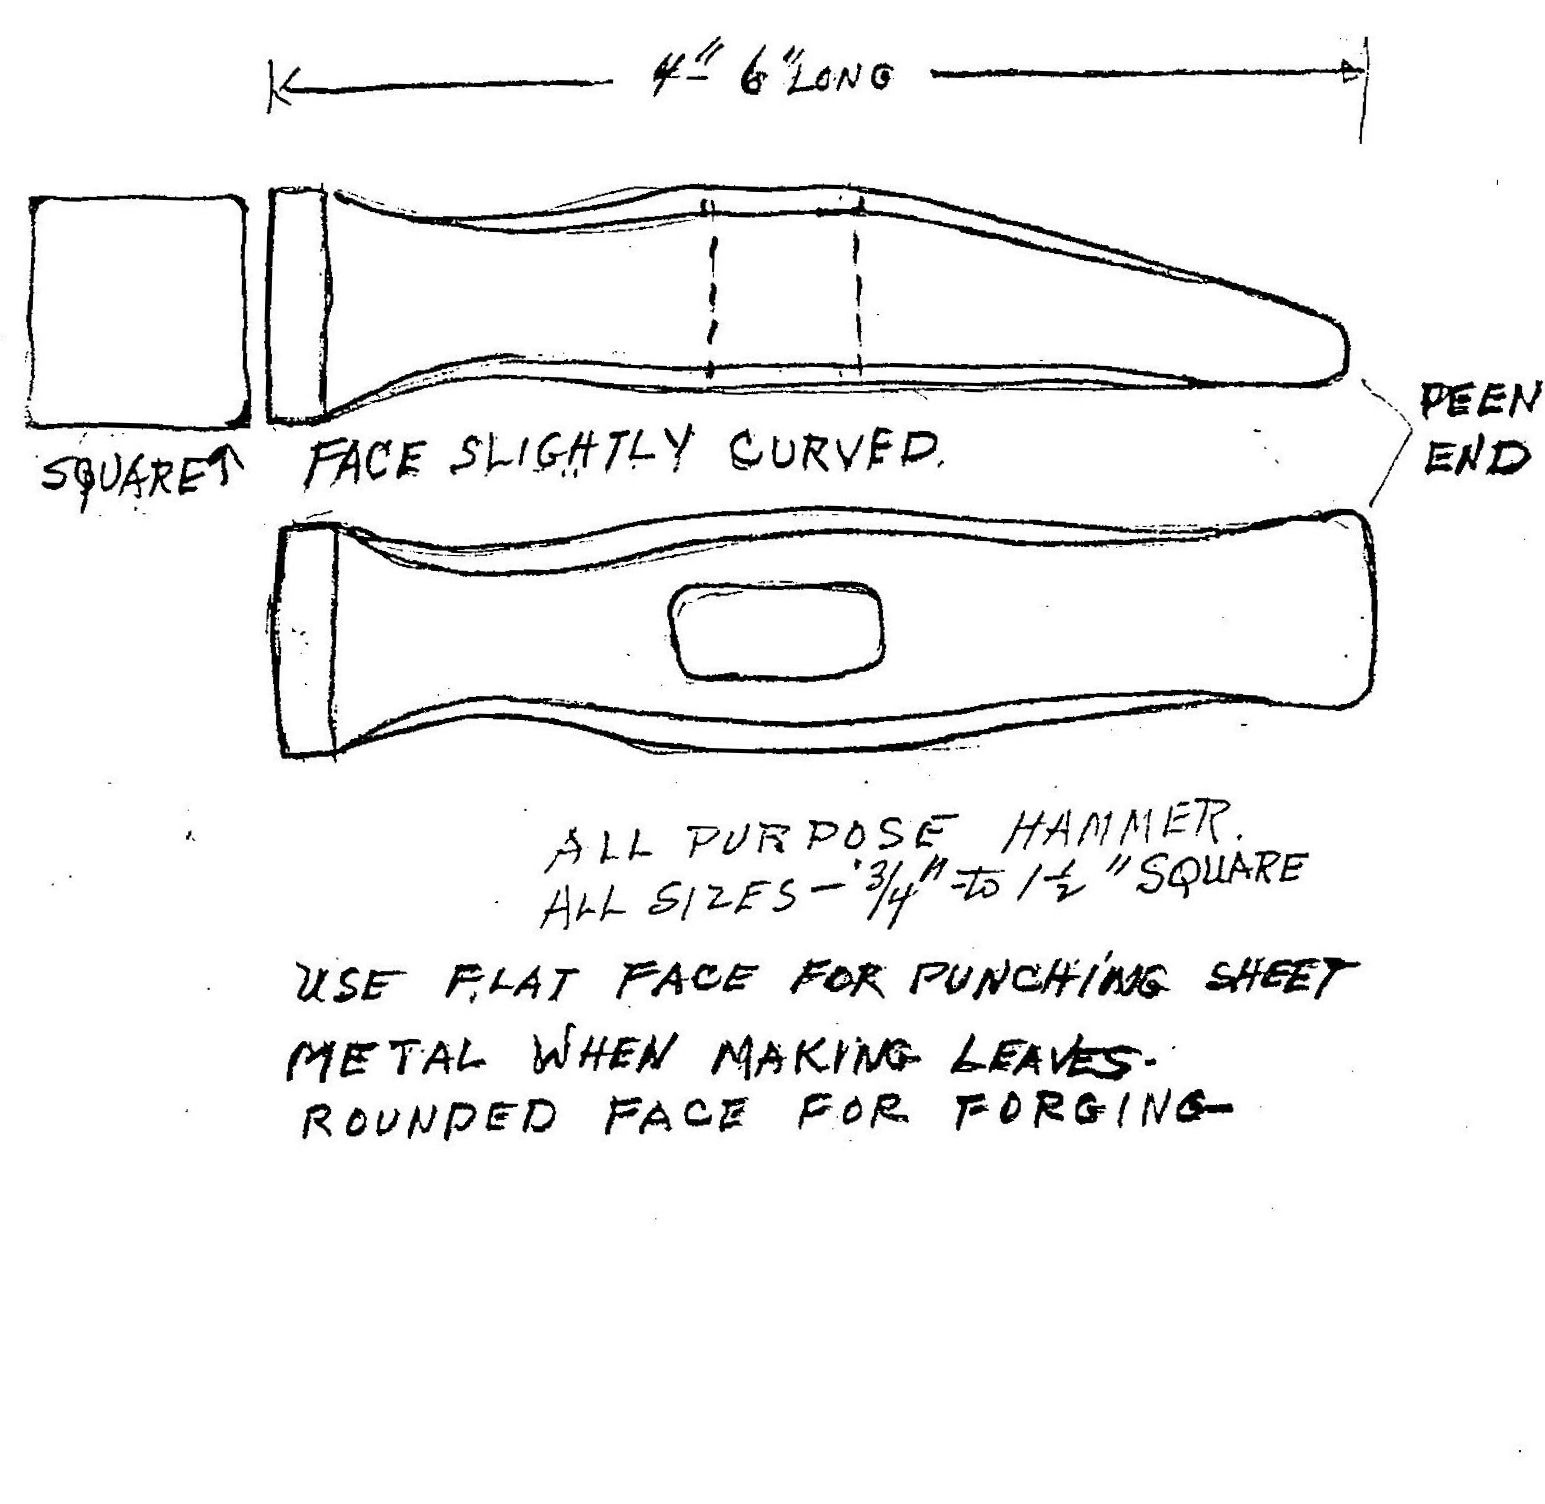
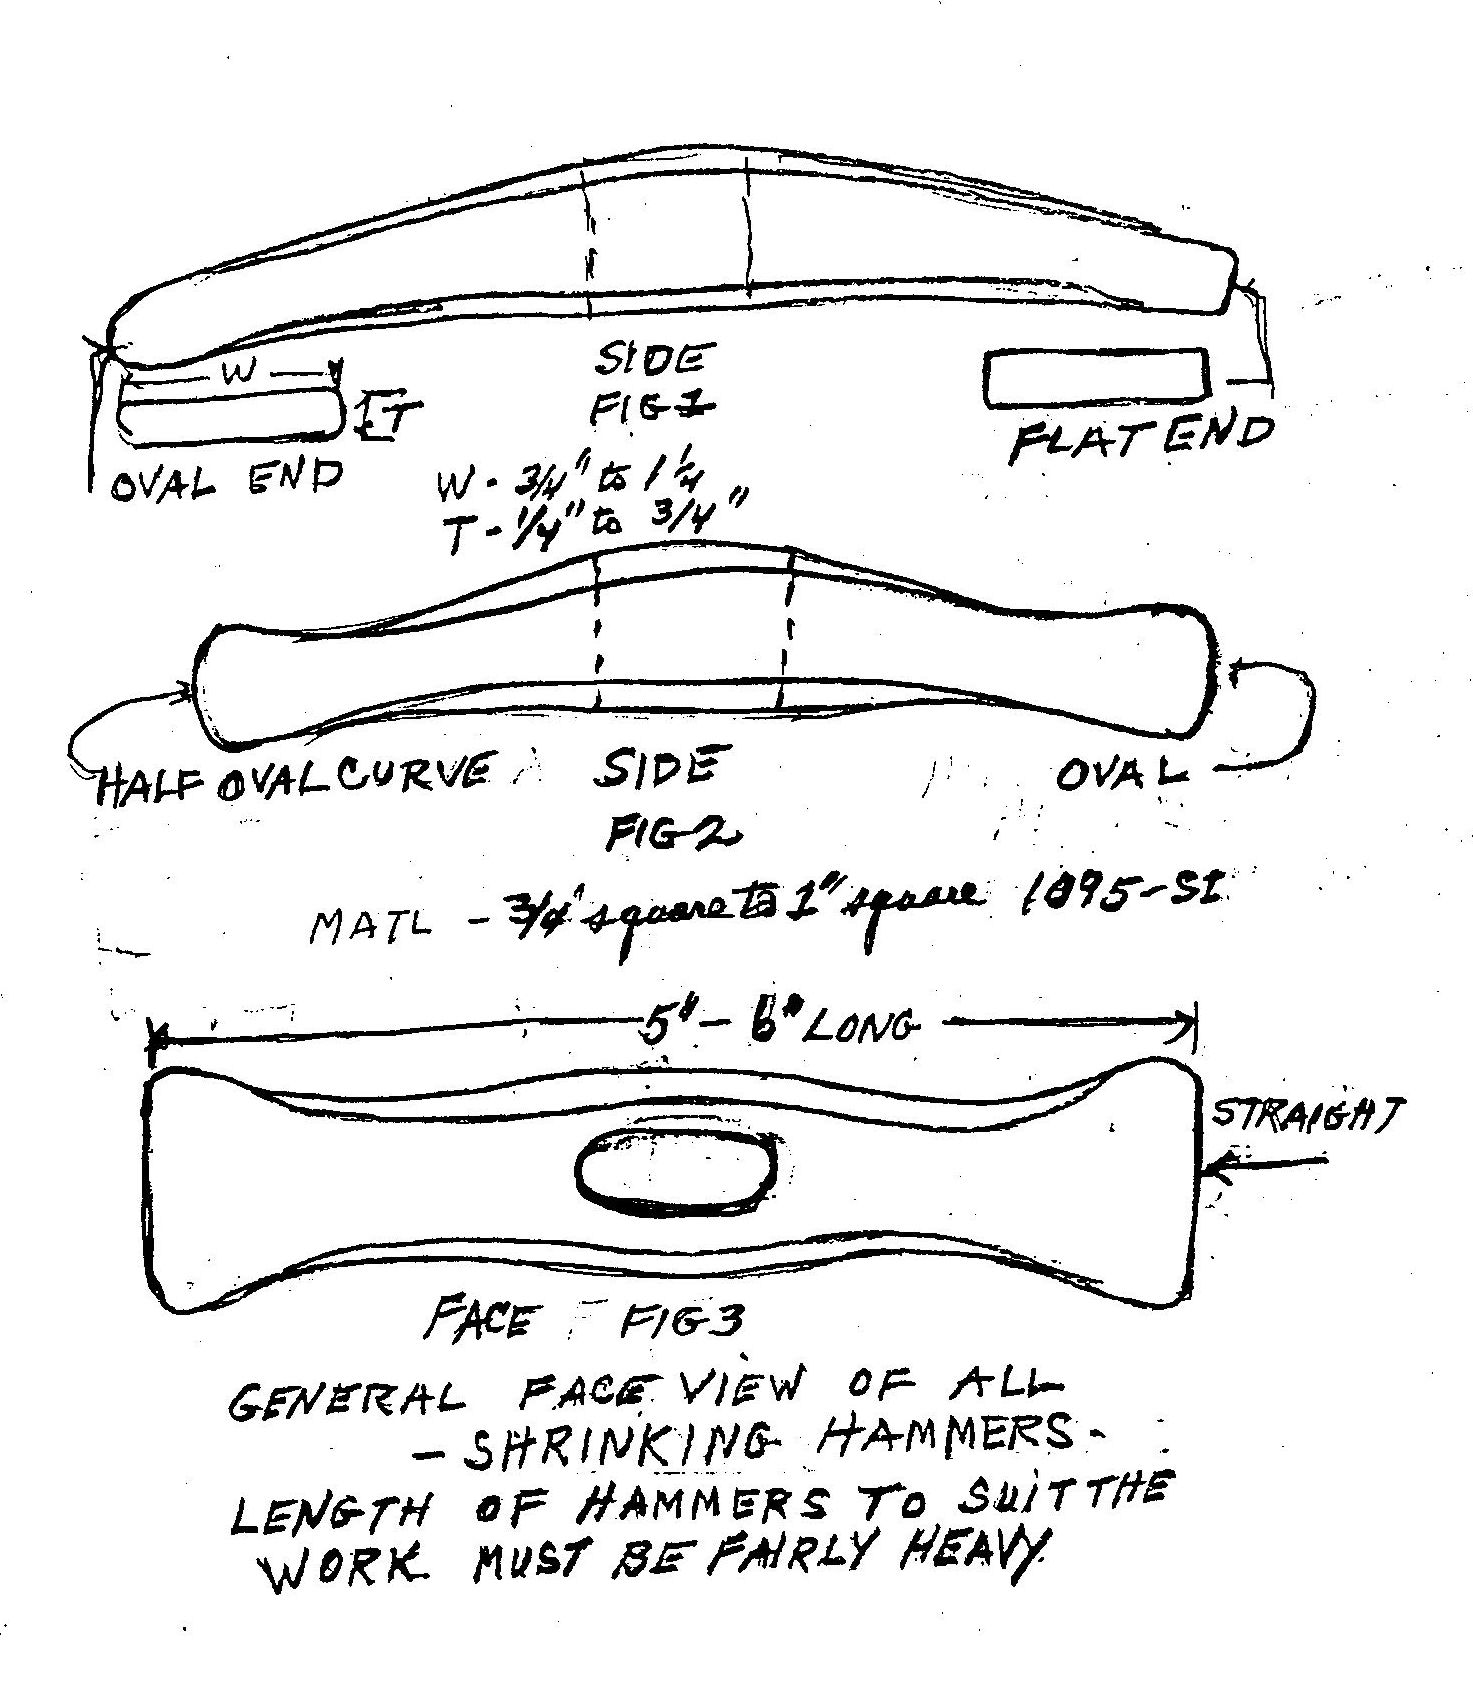
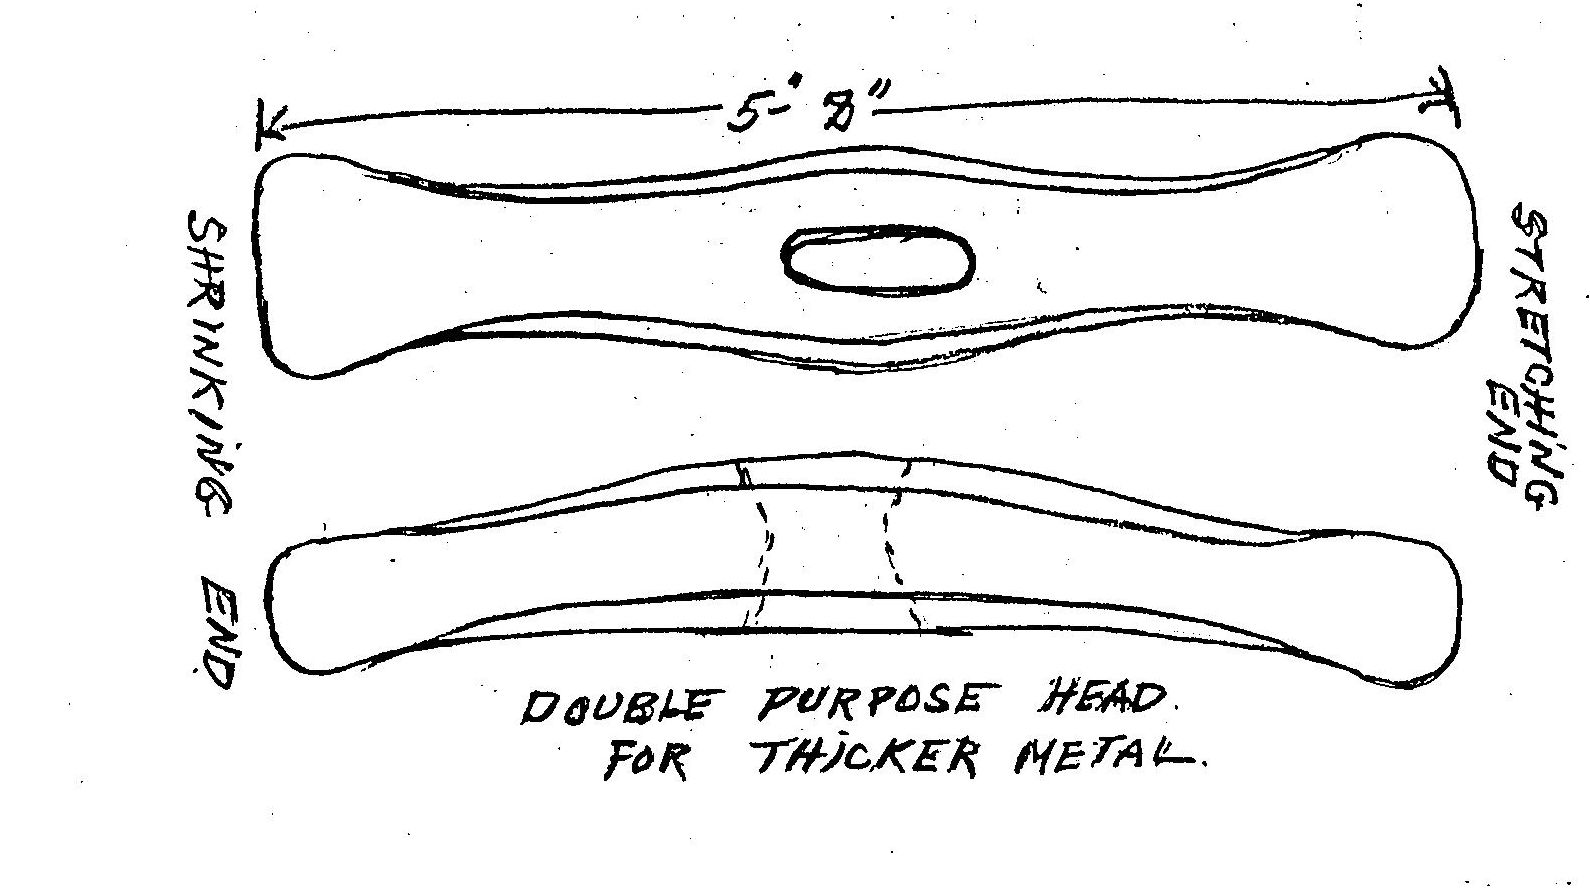
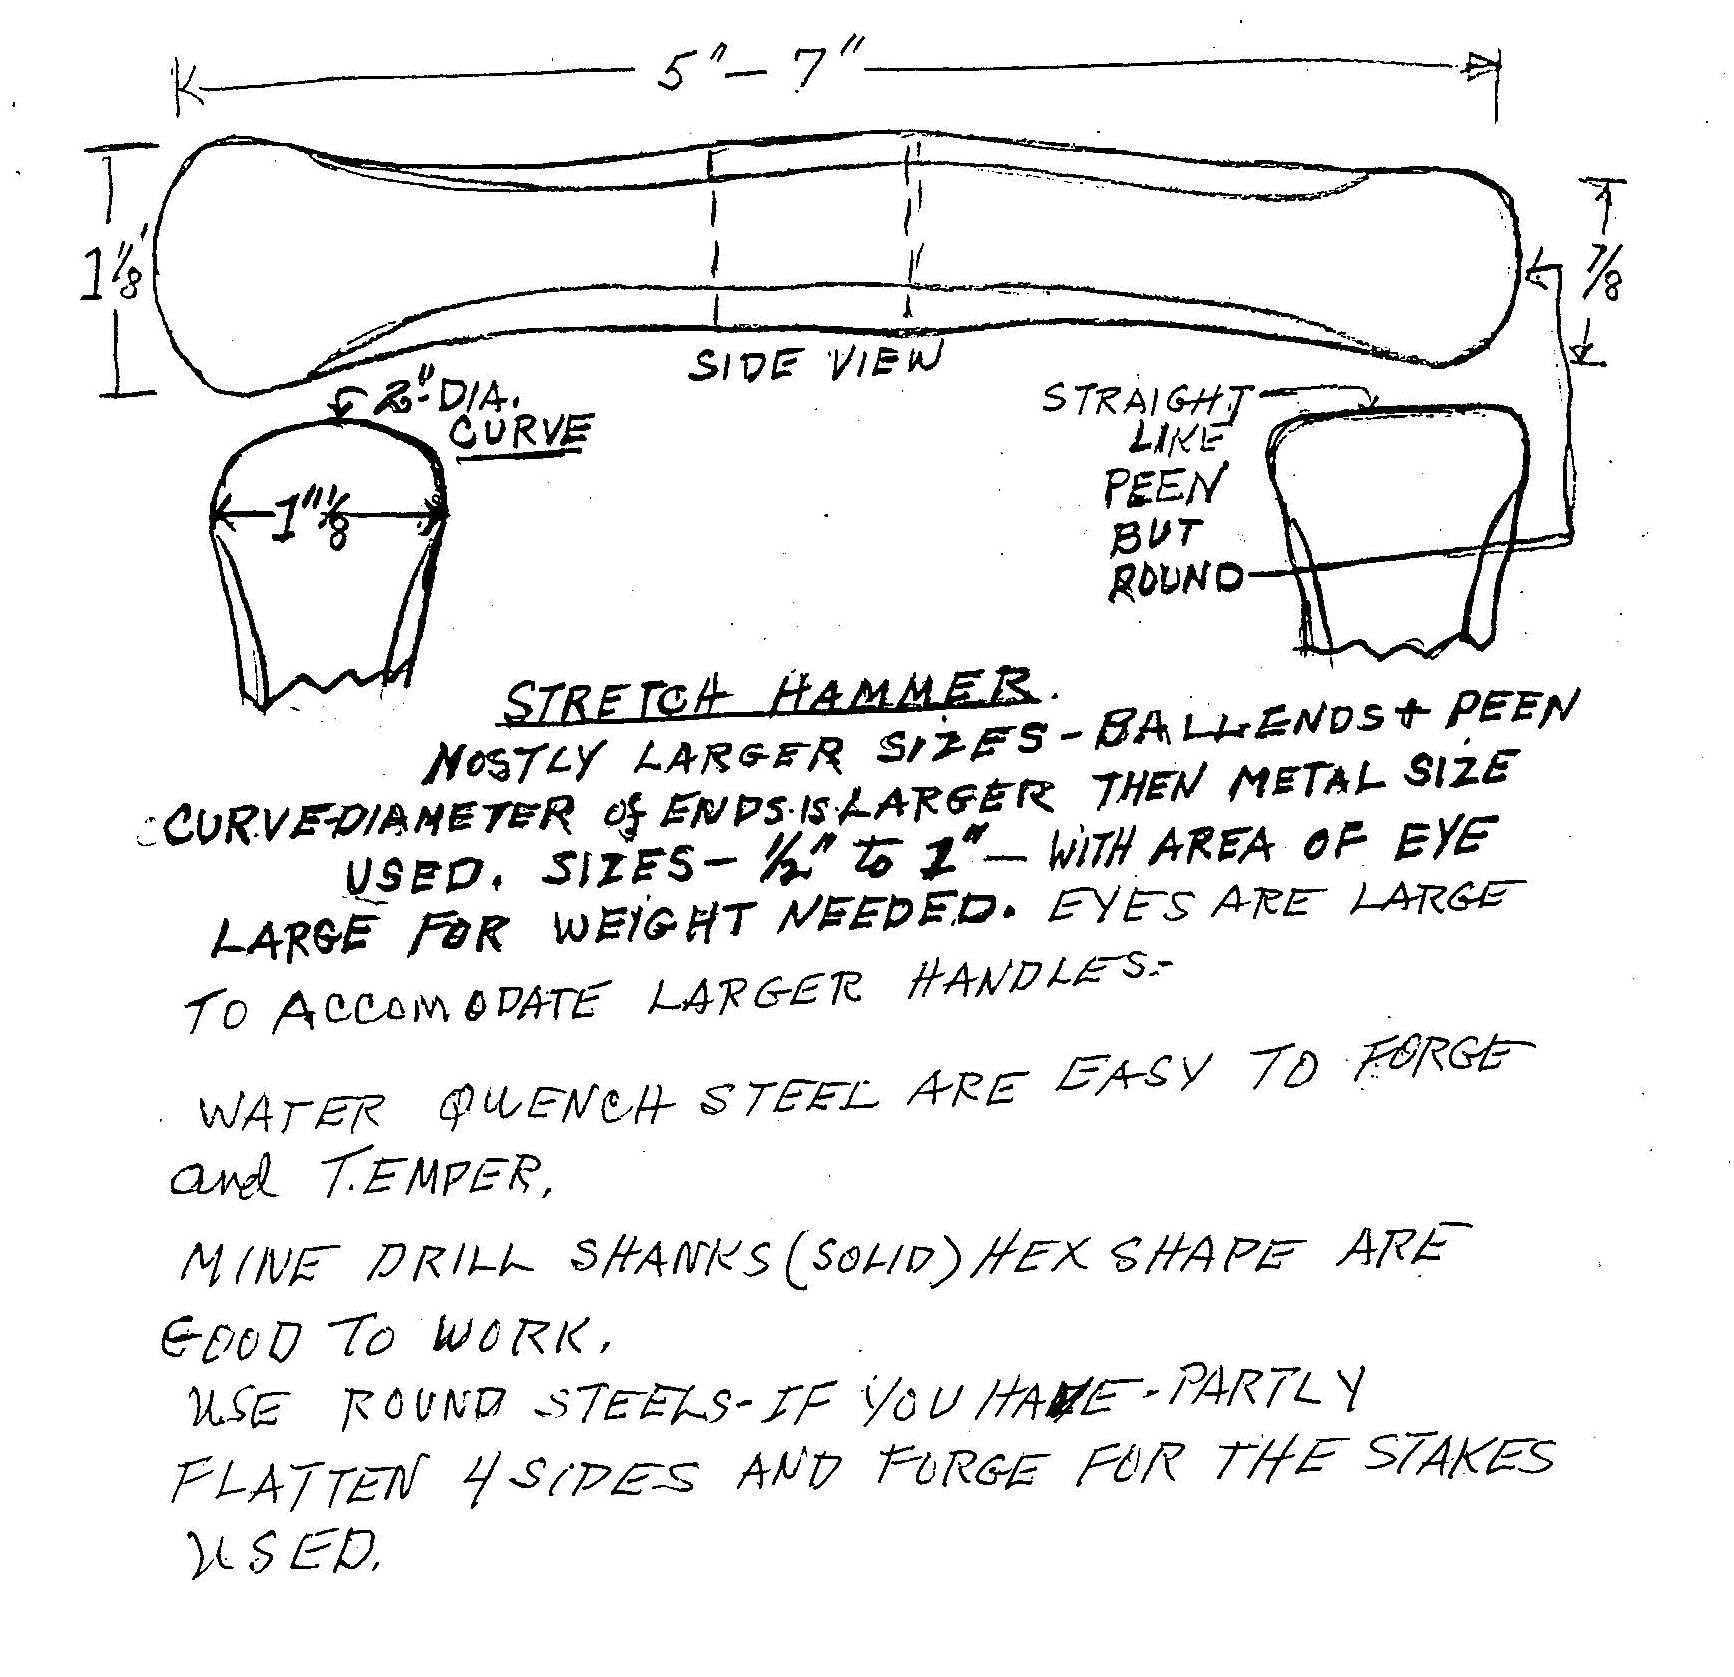
Hammers
Handles made too small will force squeezing or gripping which will tire the hand and stress finger tendons in palm. Hammer handles should fit comfortably and loosely in hand. Then size the eye in the head proportionate to the head, weight, and size of the handle used. Temper hot, forging hammers a medium blue.
Draw Repousse hammers and under tools to a brown color ((bronze?)) with purple spots.
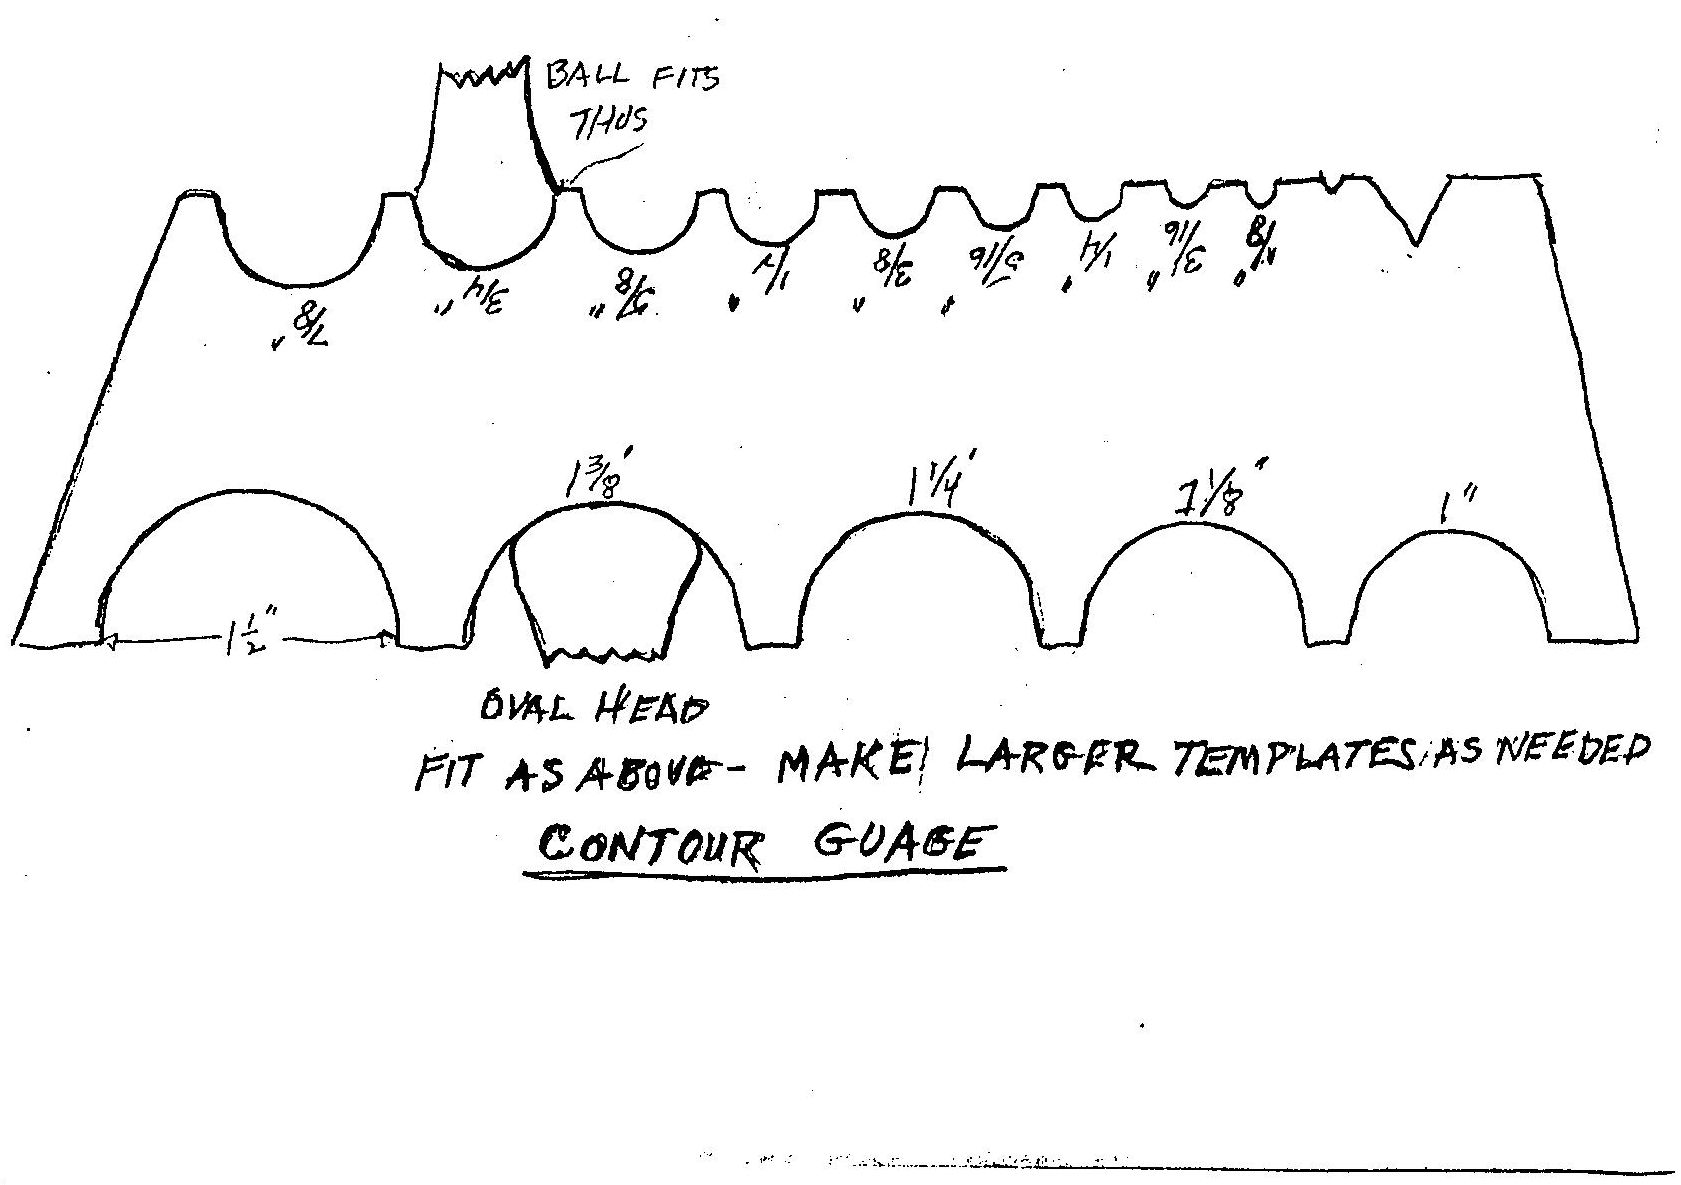
Use carpenters glue to hold heads plus wood and iron wedges. Use 1/8″ soft aluminum plate to check head marks or as we say “track marks.” To make heads same shape but different weights, have same contour marks. You can also press the head into plasticine clay.
Use radius gauge to check head shapes. Again, different sizes, different weights, but same head shape.
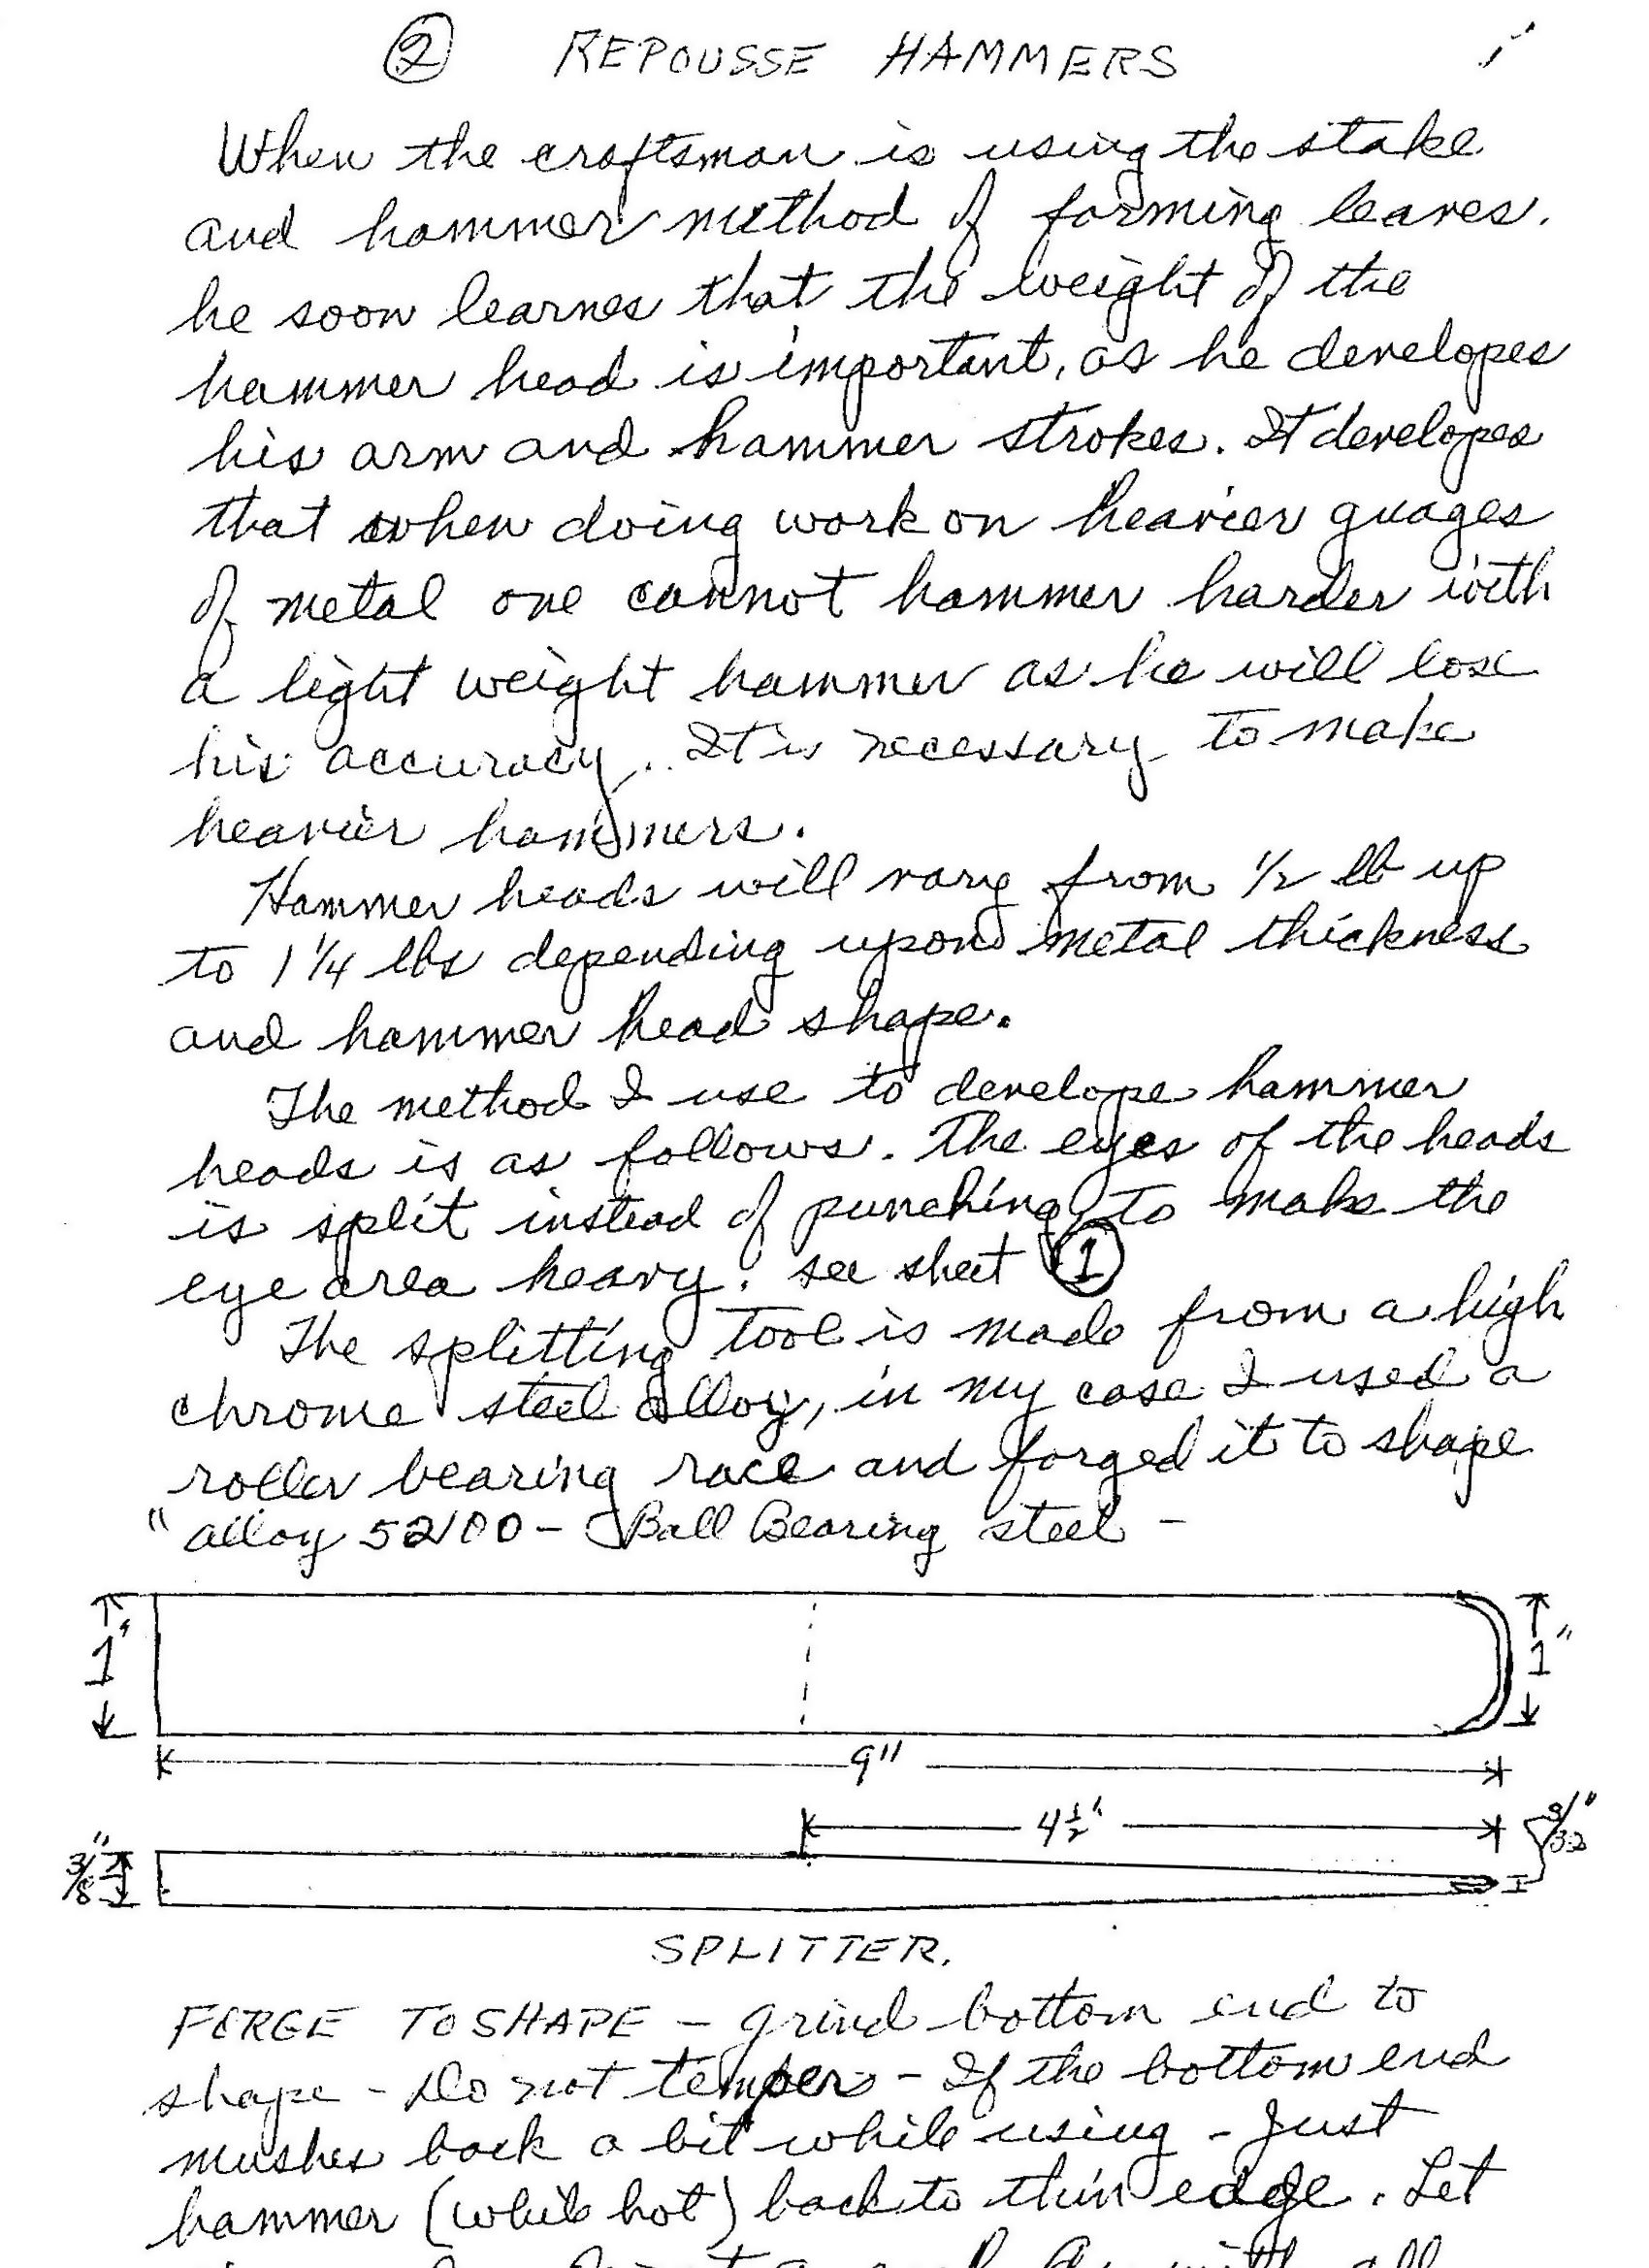
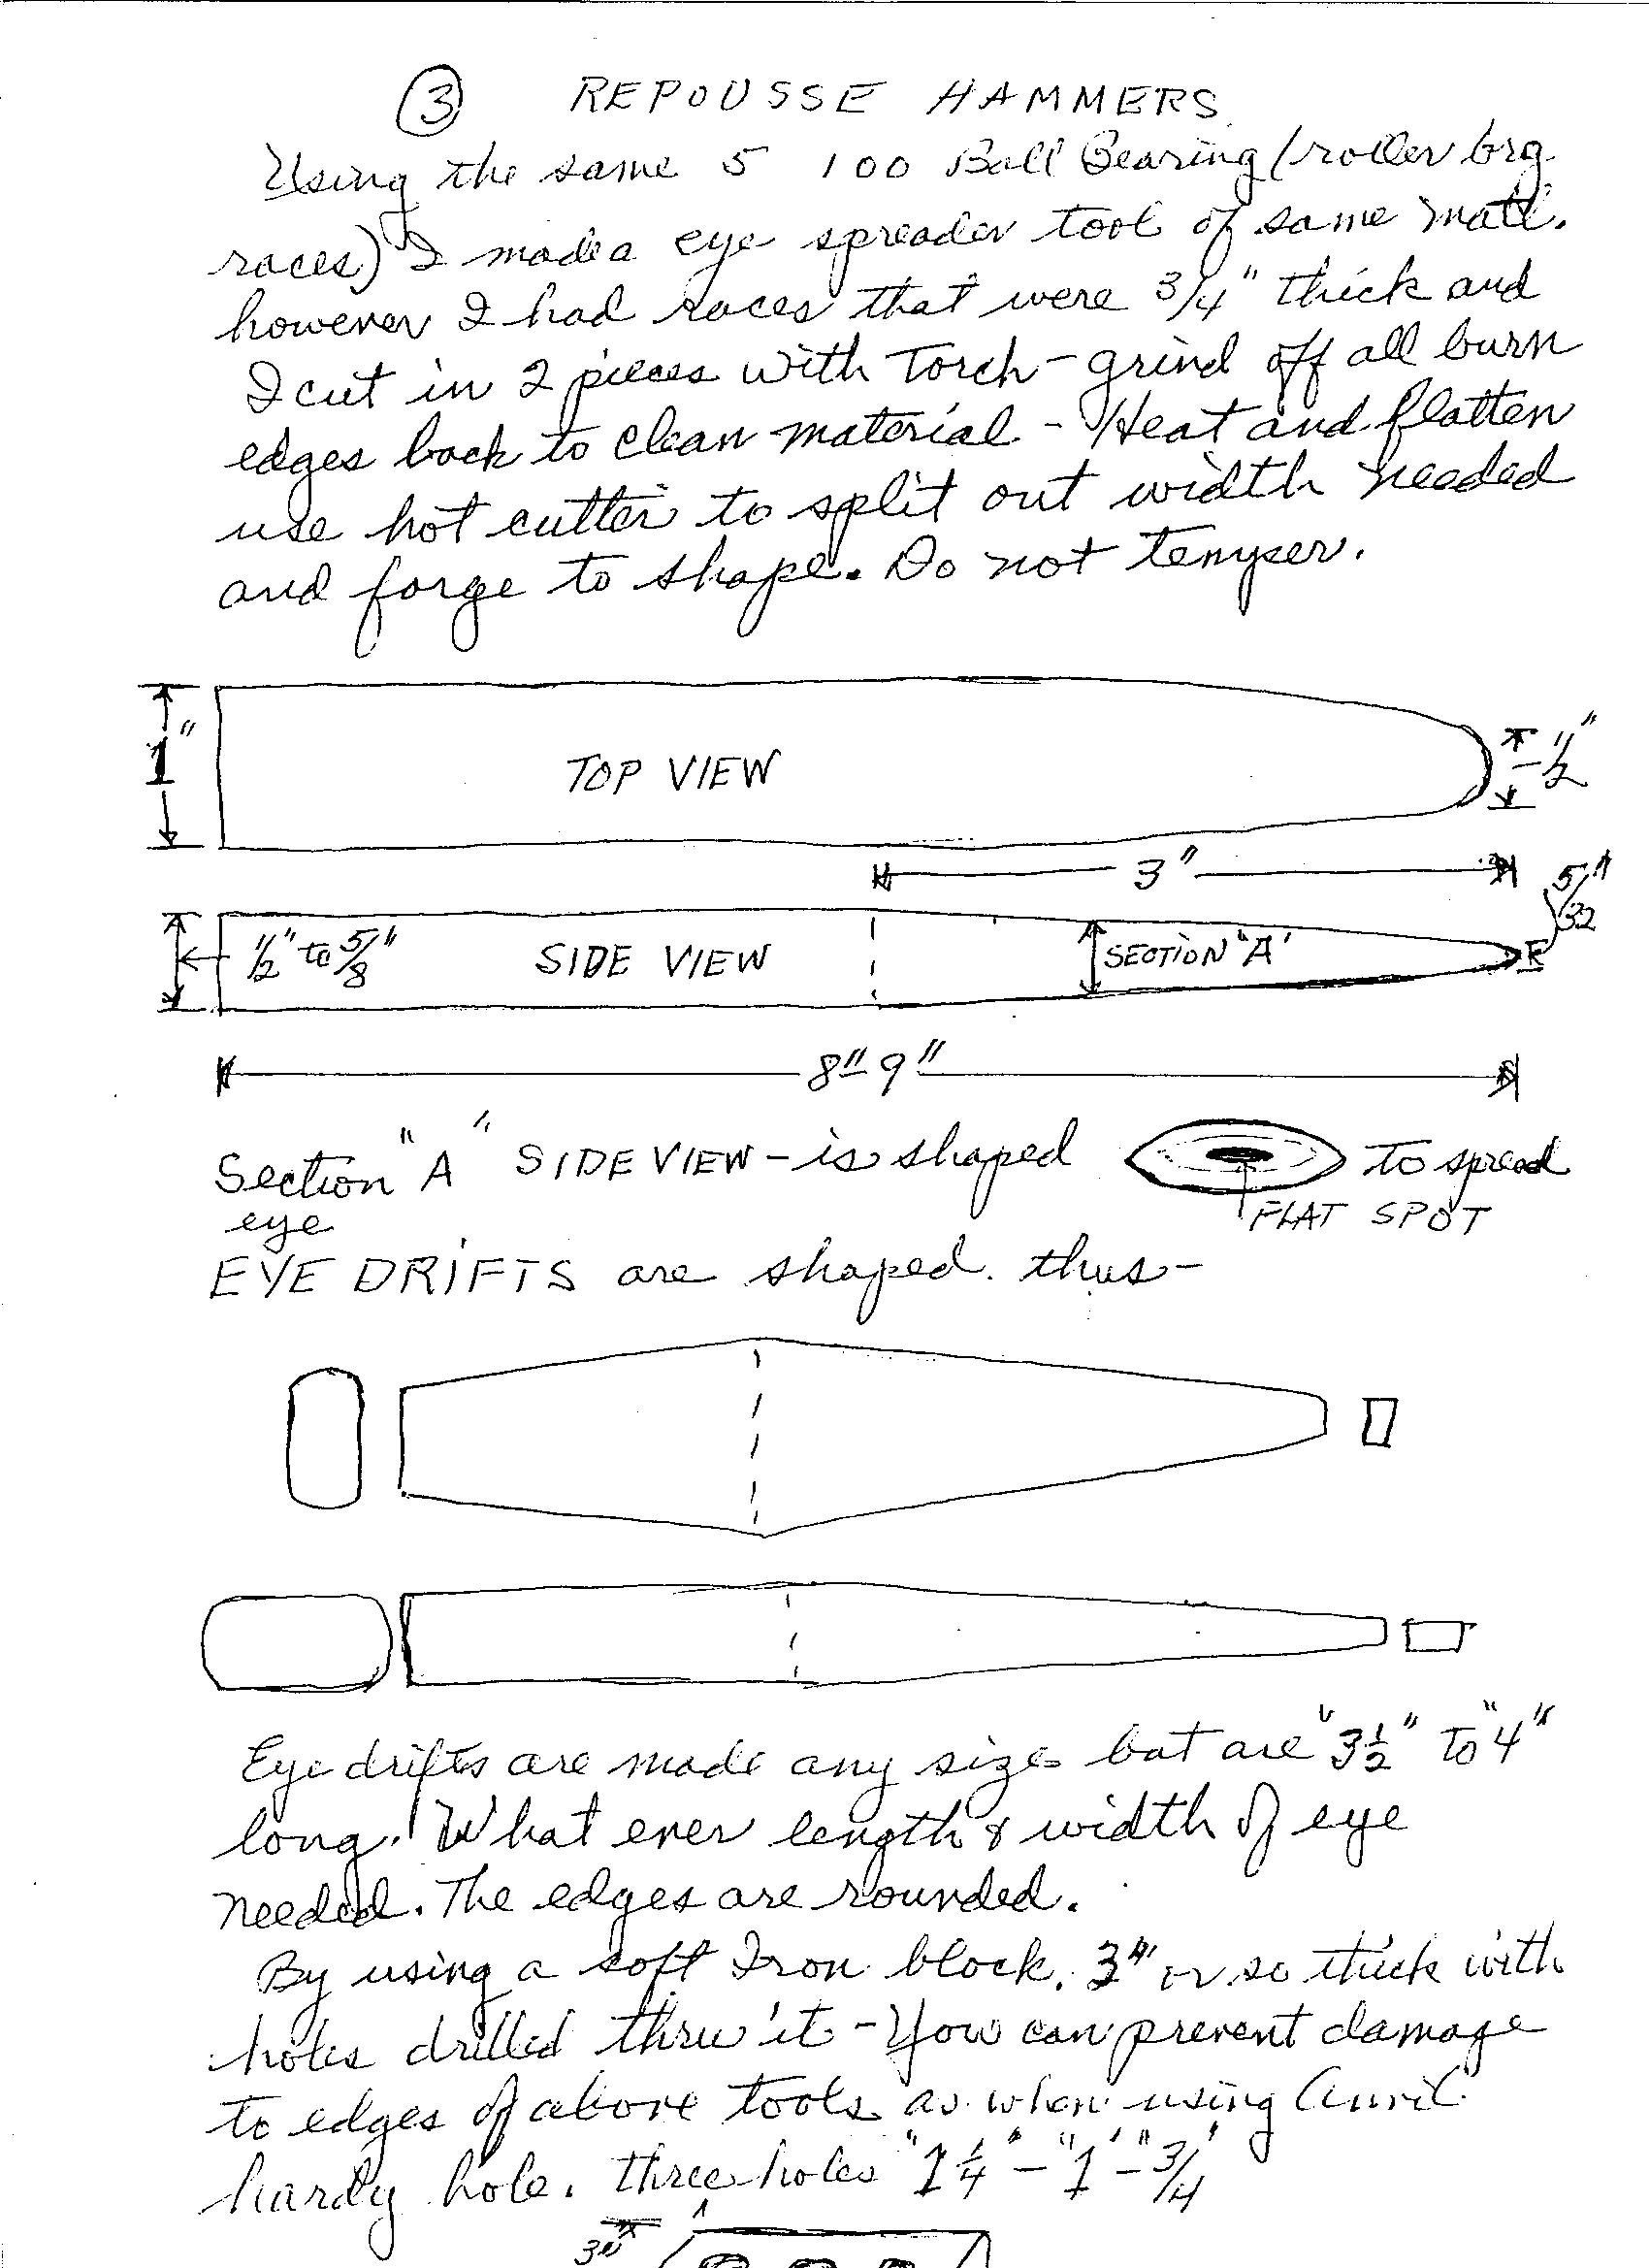
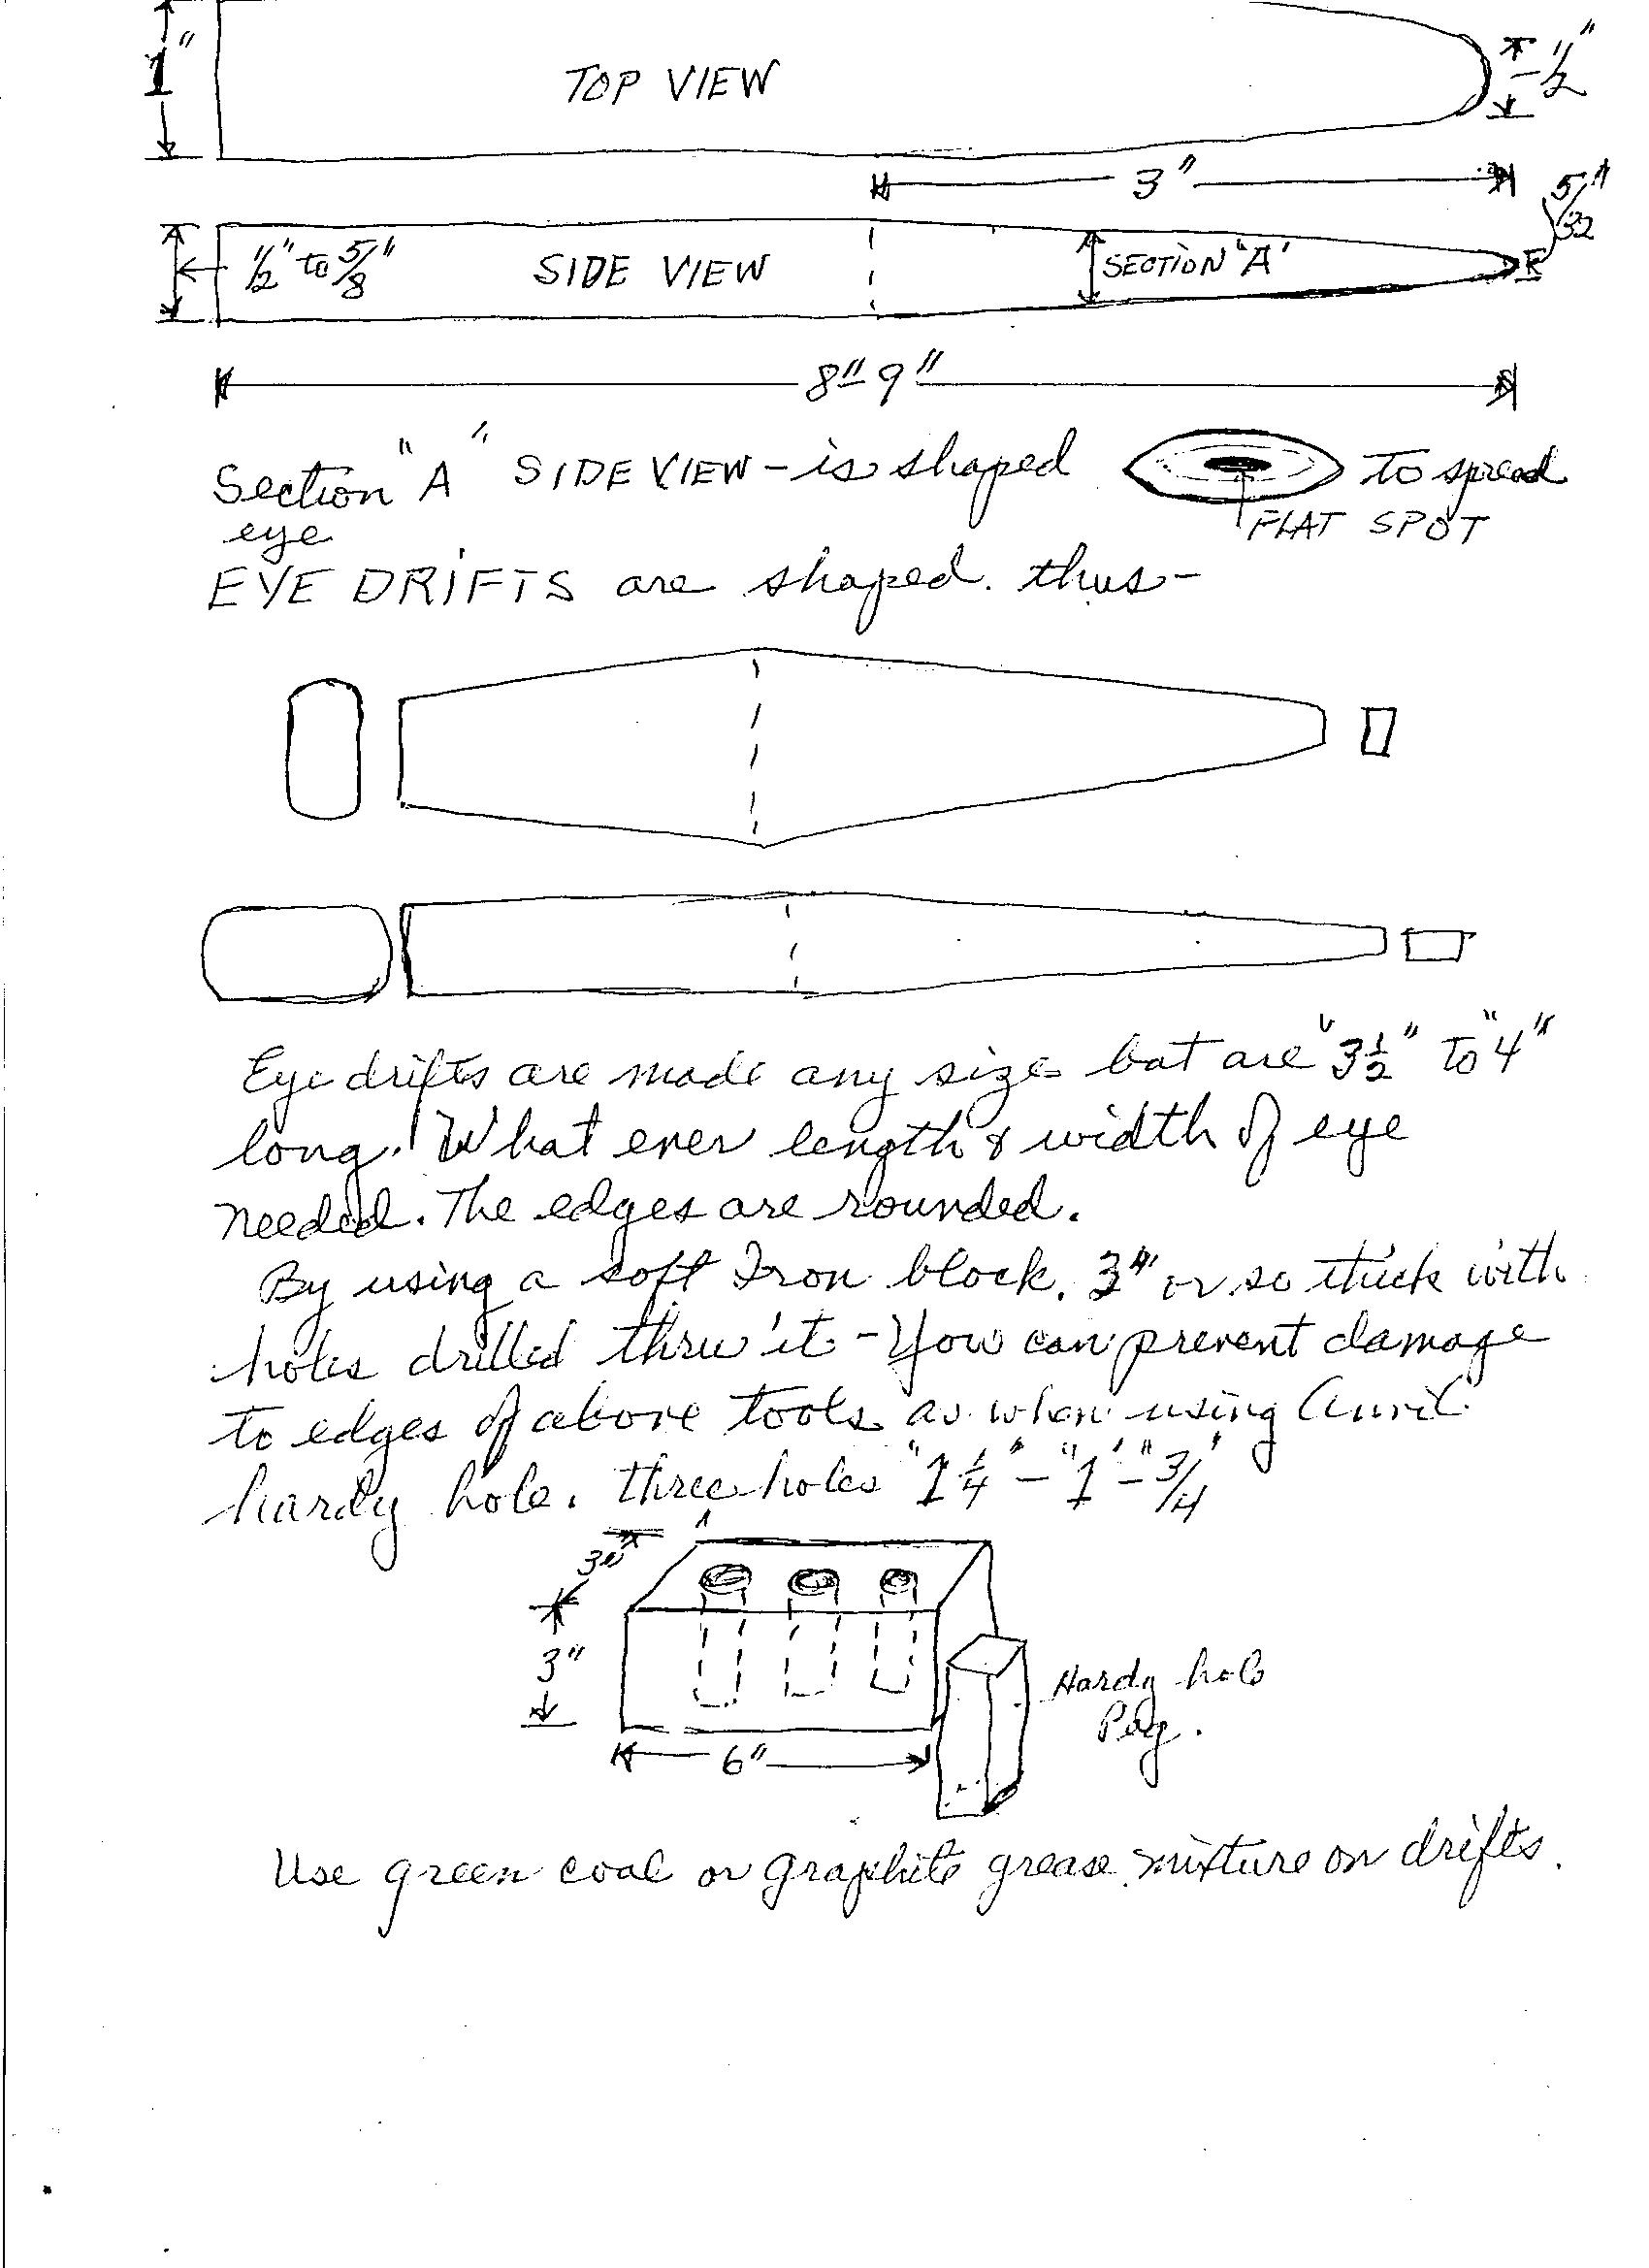
I make my hammer head eye splitters of roller bearing races.
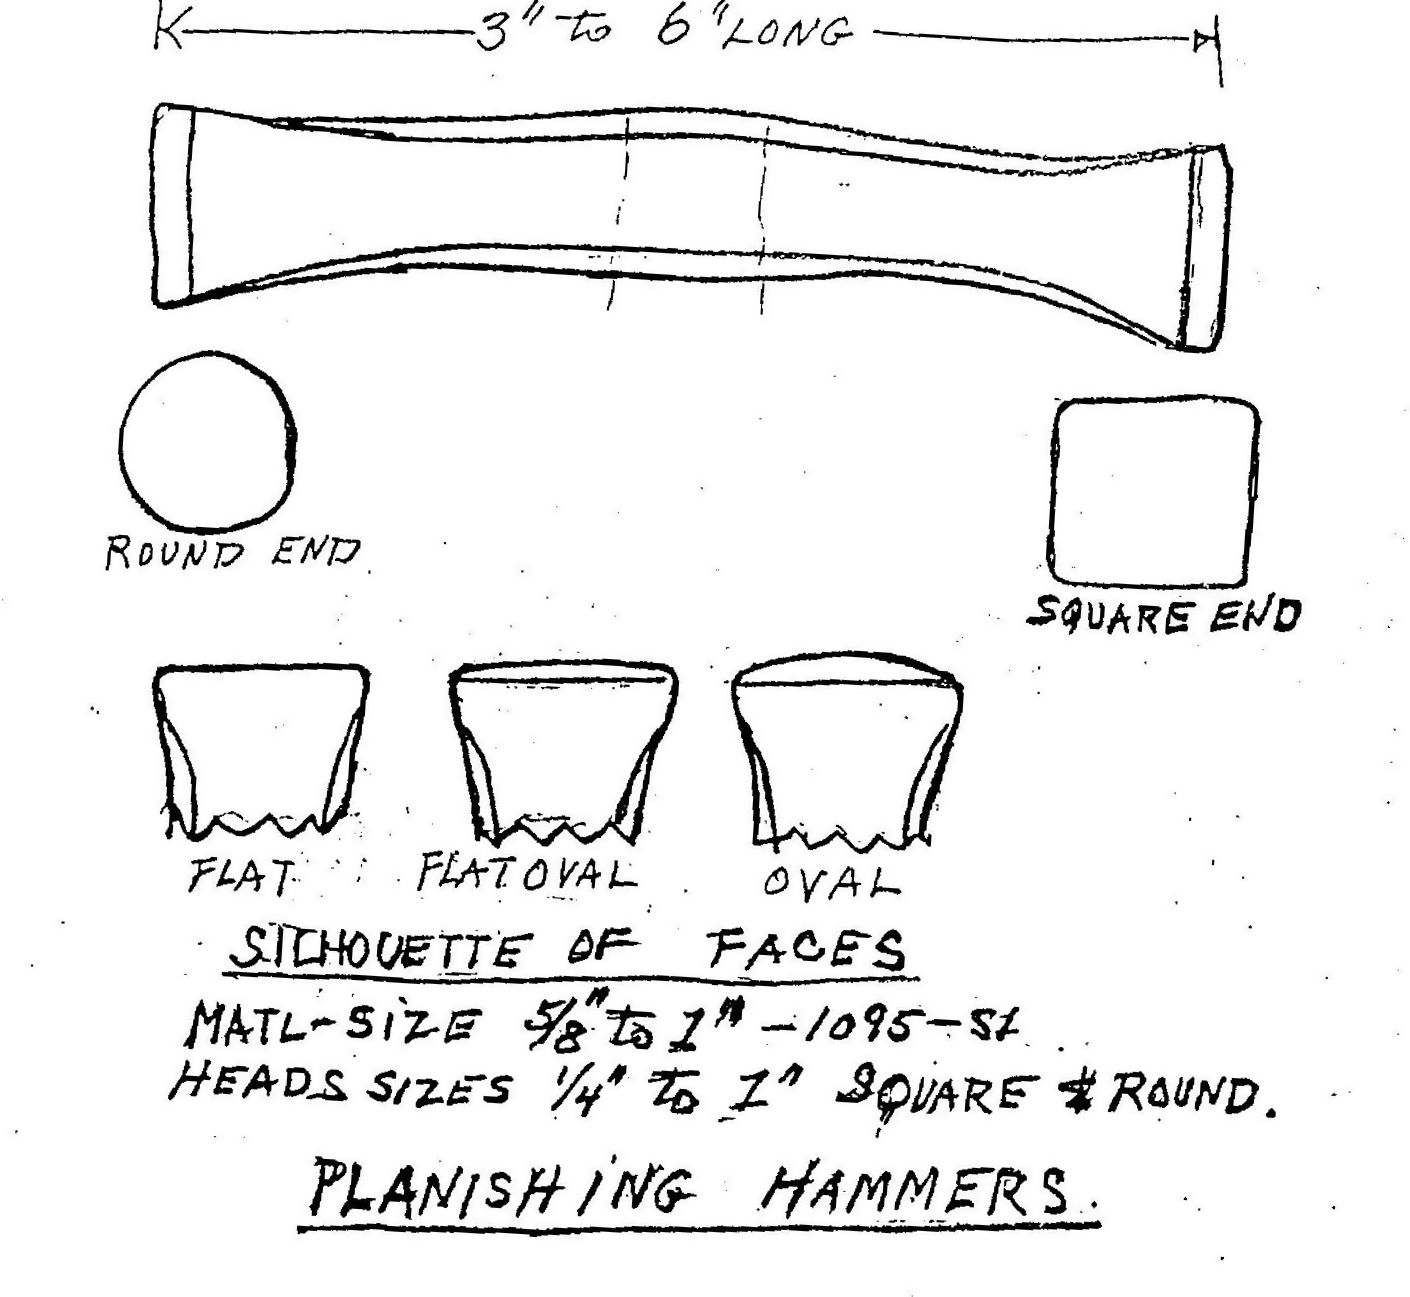
Curve of head to correspond to wrist, elbow, or shoulder hammers. Make templates to check curve of heads. Faces of hammers heads to be flat and square to work. Flat face hammers or curved face hammers have different uses. Flat face on convex areas and curved on concave areas.
Sometimes it doesn’t matter so much the shape of the hammer one uses to make a small change or bend, but what you can do with the hammer you have in your hand.
Mallets
Wood, wood and silver for silver work. Rawhide, Micartes (Phenolic resin) filled linen (finer texture than cotton cloth and harder). Extra High Density Plastic or other plastics. Fiber board.
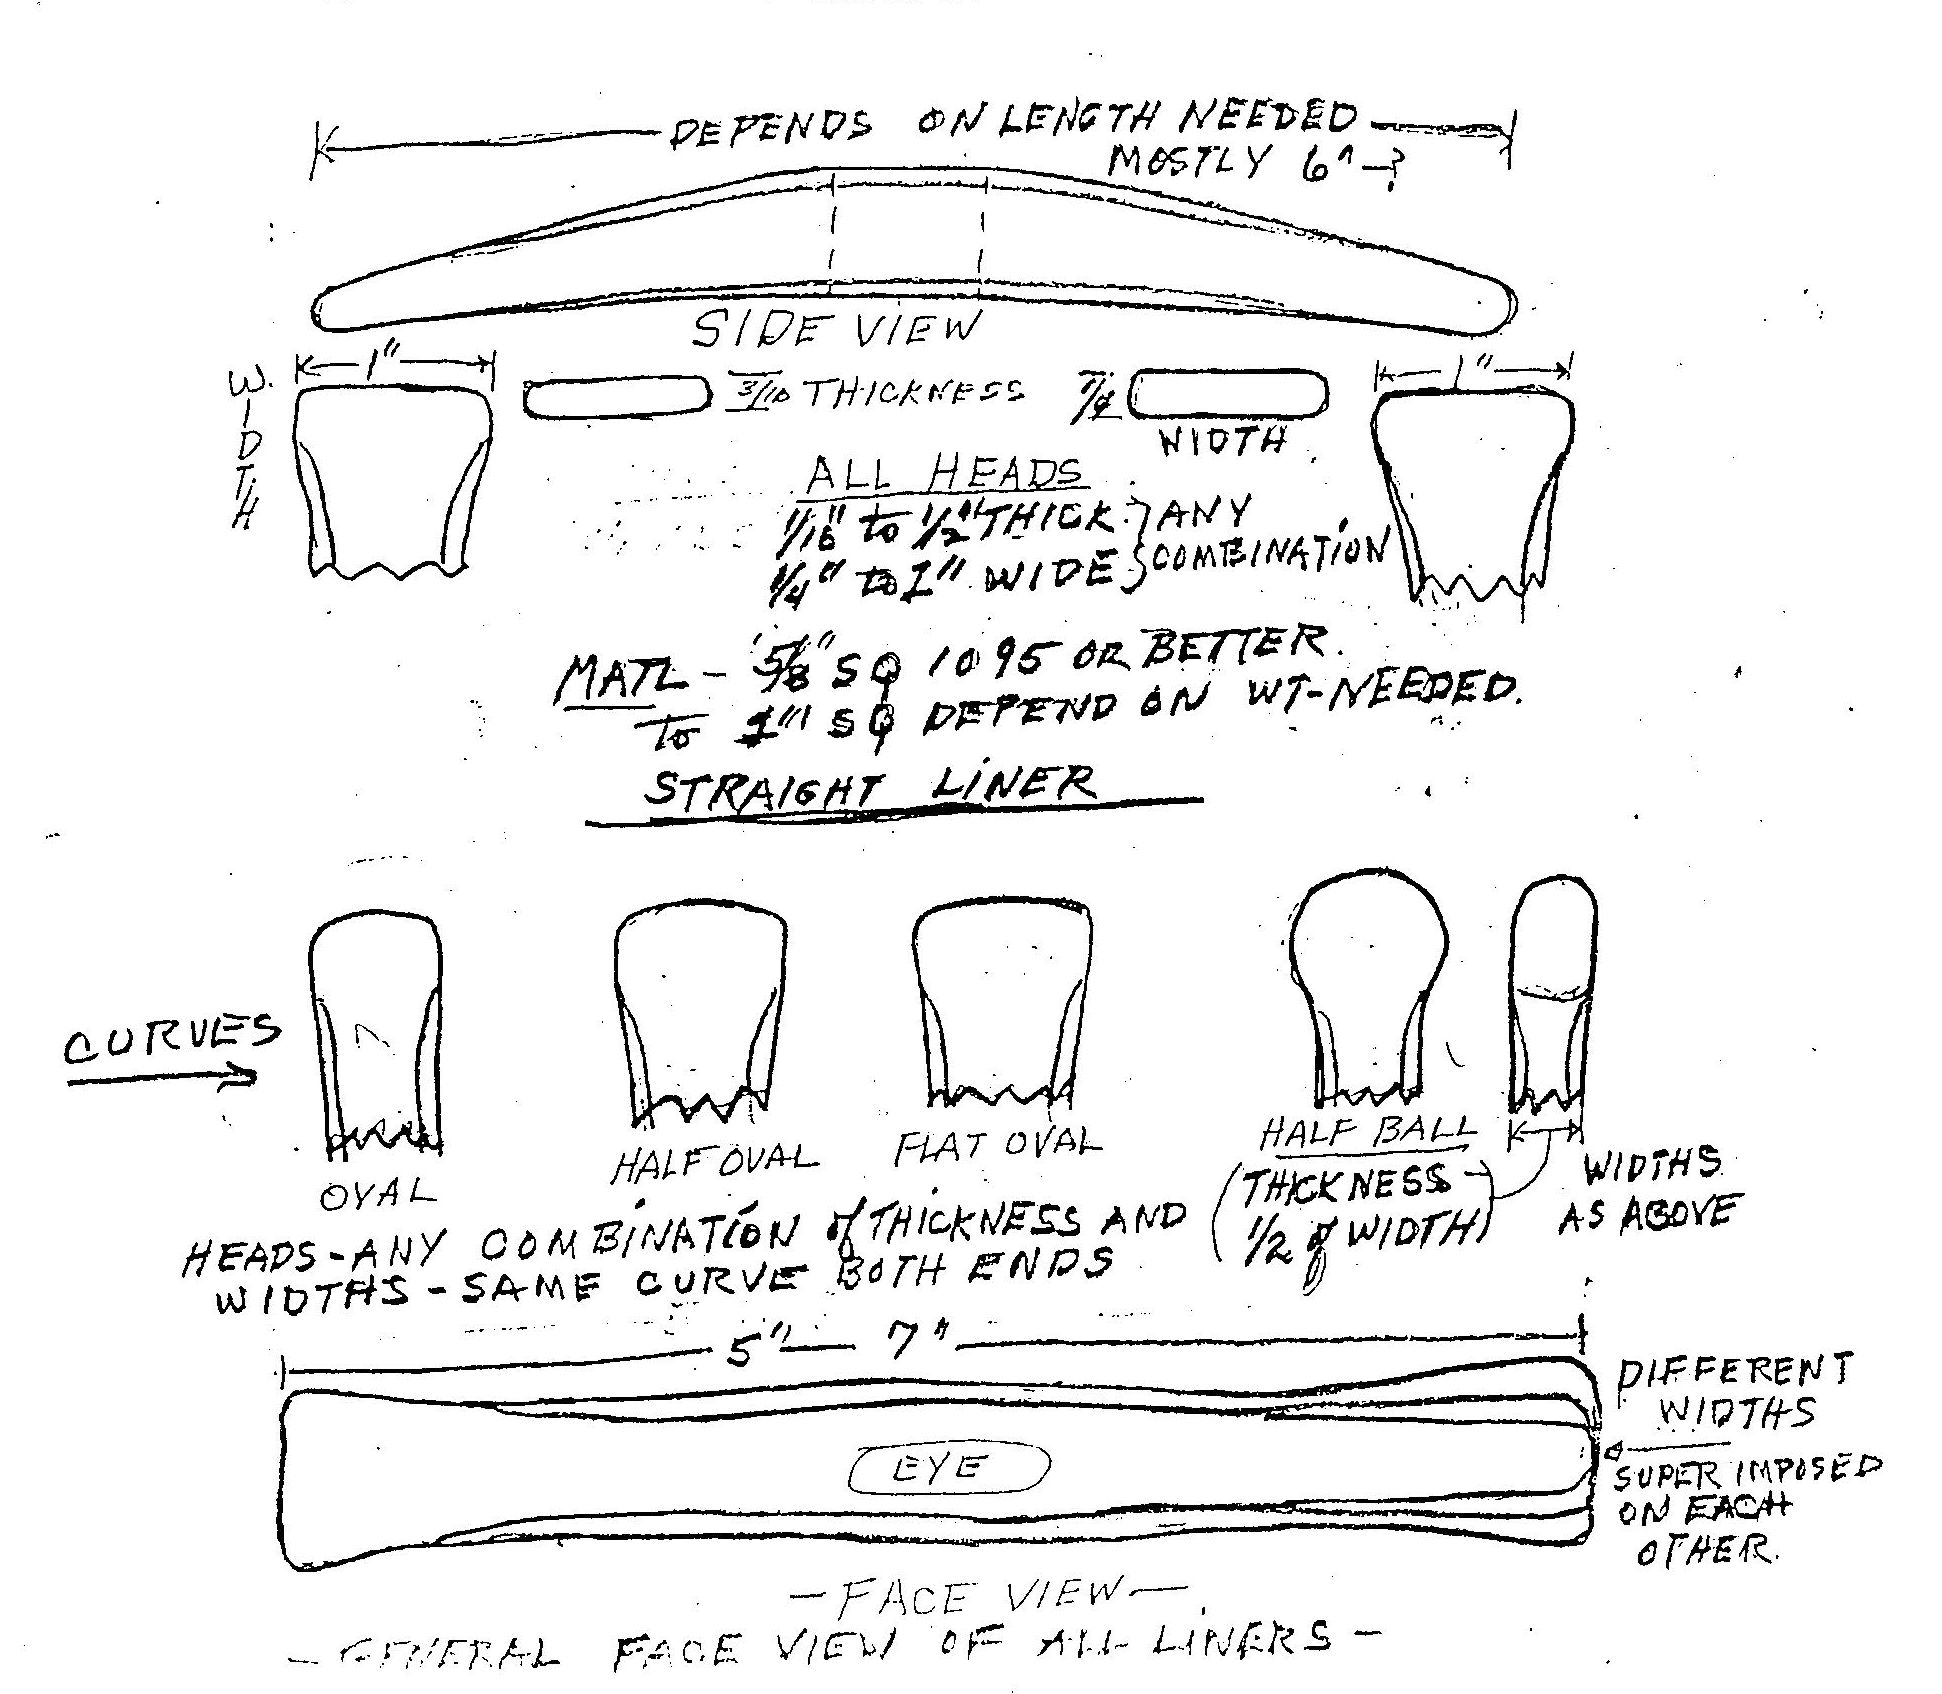
Snarling Irons
I use auto spring leaves (torch cut to a taper) about 2″ to 22″ long depending upon depth of work (thickness from 1/4 – 3/8″ and 3/4 – 1-1/4″ wide in main arms.) My best one is 1-1/4″ wide at the base and 3/4 at the tip with a 7/16″ nut welded on the end. Use auto head bolts, as they don’t break off at lock nut (to secure bolt) weld balls or other shapes larger than bolt heads on to bolt with stainless rod. Temper end if needed; however, if tool steel is used, it often doesn’t need tempering.