Evolution of a Chandelier

“Reproduction Chandelier” , 2004, mild steel, black Gilders paste finish
Two of the installations in this blog have dealt with repoussé elements applied to a reproduction of a Cyril Colnik chandelier, made for the “Captain Frederick Pabst Mansion” back in 2004. (See above image.)
In this installment, I would like to share some images that show the progression of that chandelier.
Note: The original chandelier was removed from the mansion. After the deaths of Captain Pabst and his wife Maria, (Maria passed in 1906) the mansion was purchased by the Catholic Archdiocese, who used the mansion to house several archbishops. Various pieces of the mansion were removed and sold during this time. Currently, the original chandelier hangs in “Von Triers”, a German style tavern located in Milwaukee. Below is an image of the original chandelier. Additional lights were added to it over the years.

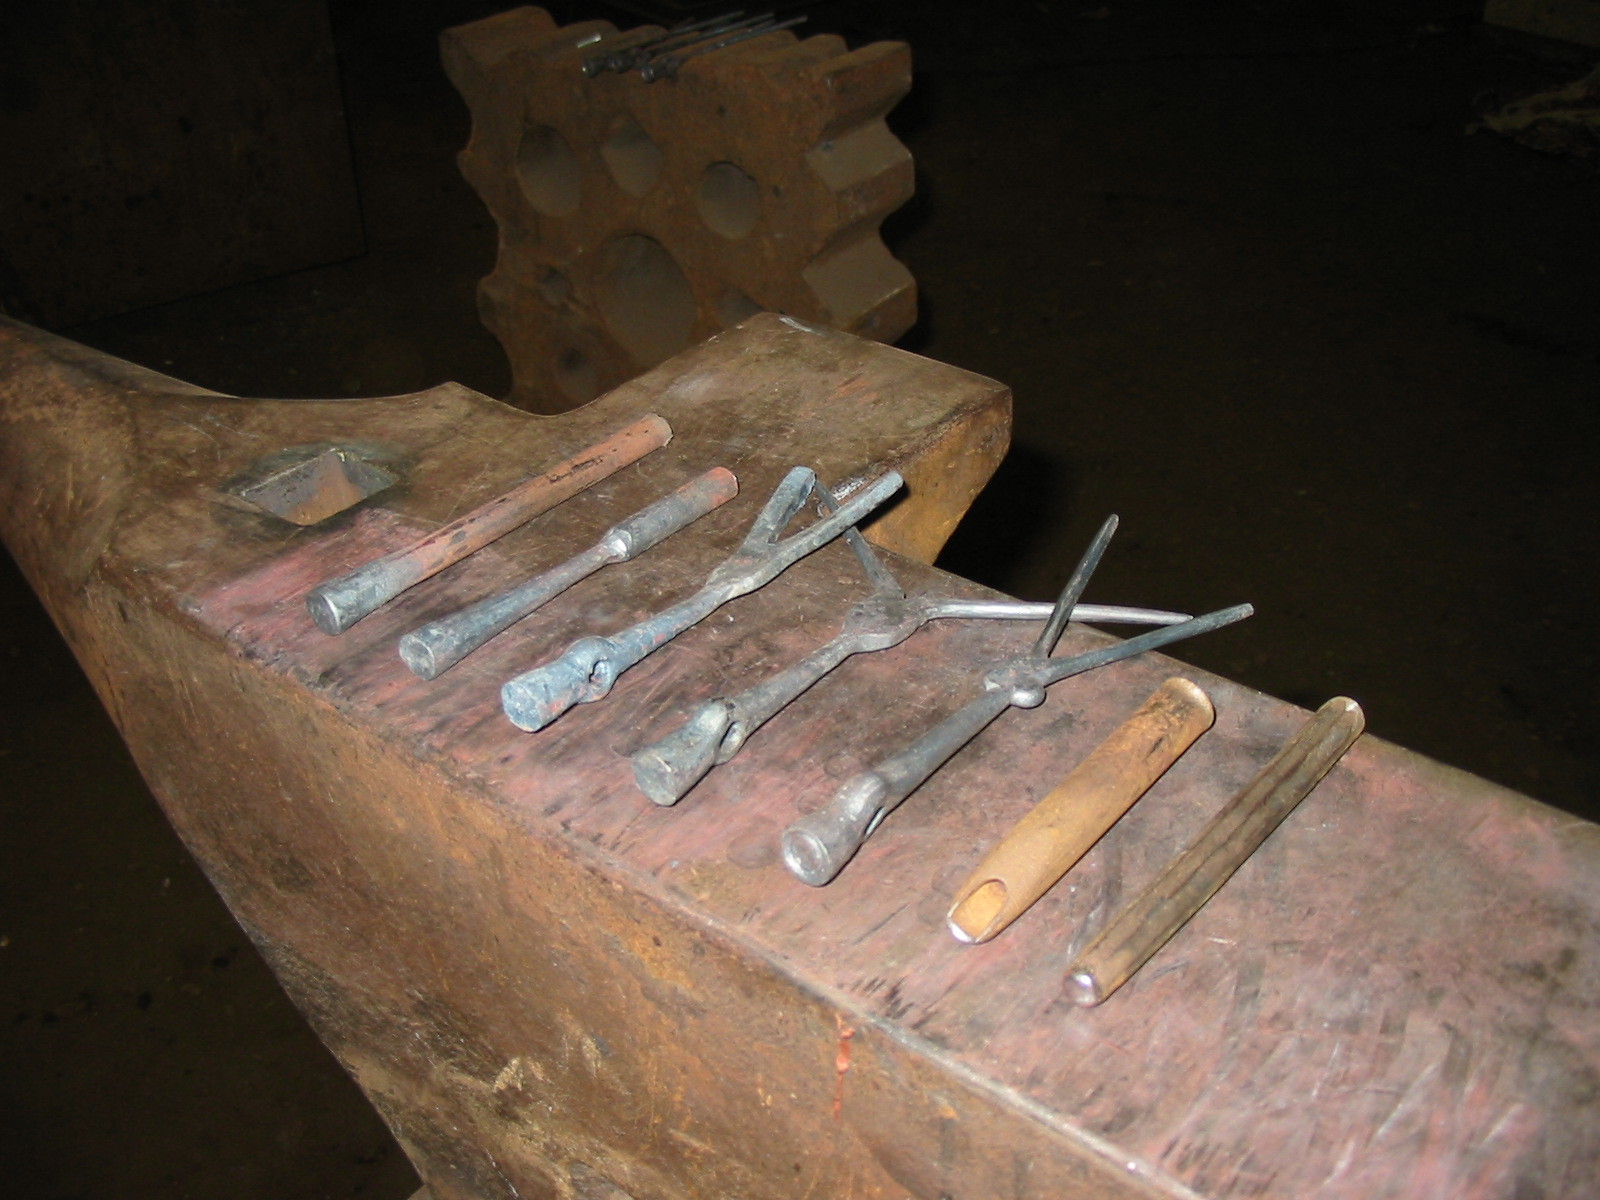
The image below shows some of the tools used for the chandelier. The large sheet metal ring, antlers, and tubing in this image were all used as test pieces. Shown in the foreground are dies with fullered grooves for making 1/4″ half-round stock, which was used to wrap around the sheet metal collars for the antlers. Notice also the wire forms, which were bent to shape while inspecting the original chandelier. These forms were the patterns for the lamps, which extended out from the main central ring.
Test pieces, through trial and error, provide valuable information for making the final forms.

The below image shows the two acorn dies, made from mild steel that was heated to bright yellow, then using the power hammer, were formed over “master acorns”, that I had earlier made from mild steel. While still very hot, the dies were then quenched to give them some hardness. Though mild steel, the dies produced many acorns, and show no signs of wear.
There is also a “decorative collar” die, (center) which was made the same way as the acorn dies. Once the collars were forged, they were bored out on the lathe to fit over the tubing.
The barrel shaped pieces on the lower left were also turned on the lathe. These were used as the faux gas valves, which were highly detailed.

In this next image, you will see the progression of how the faux gas handles were made. The two tools on the right were for chasing the “growth rings” in the ends of these branch-like handles.
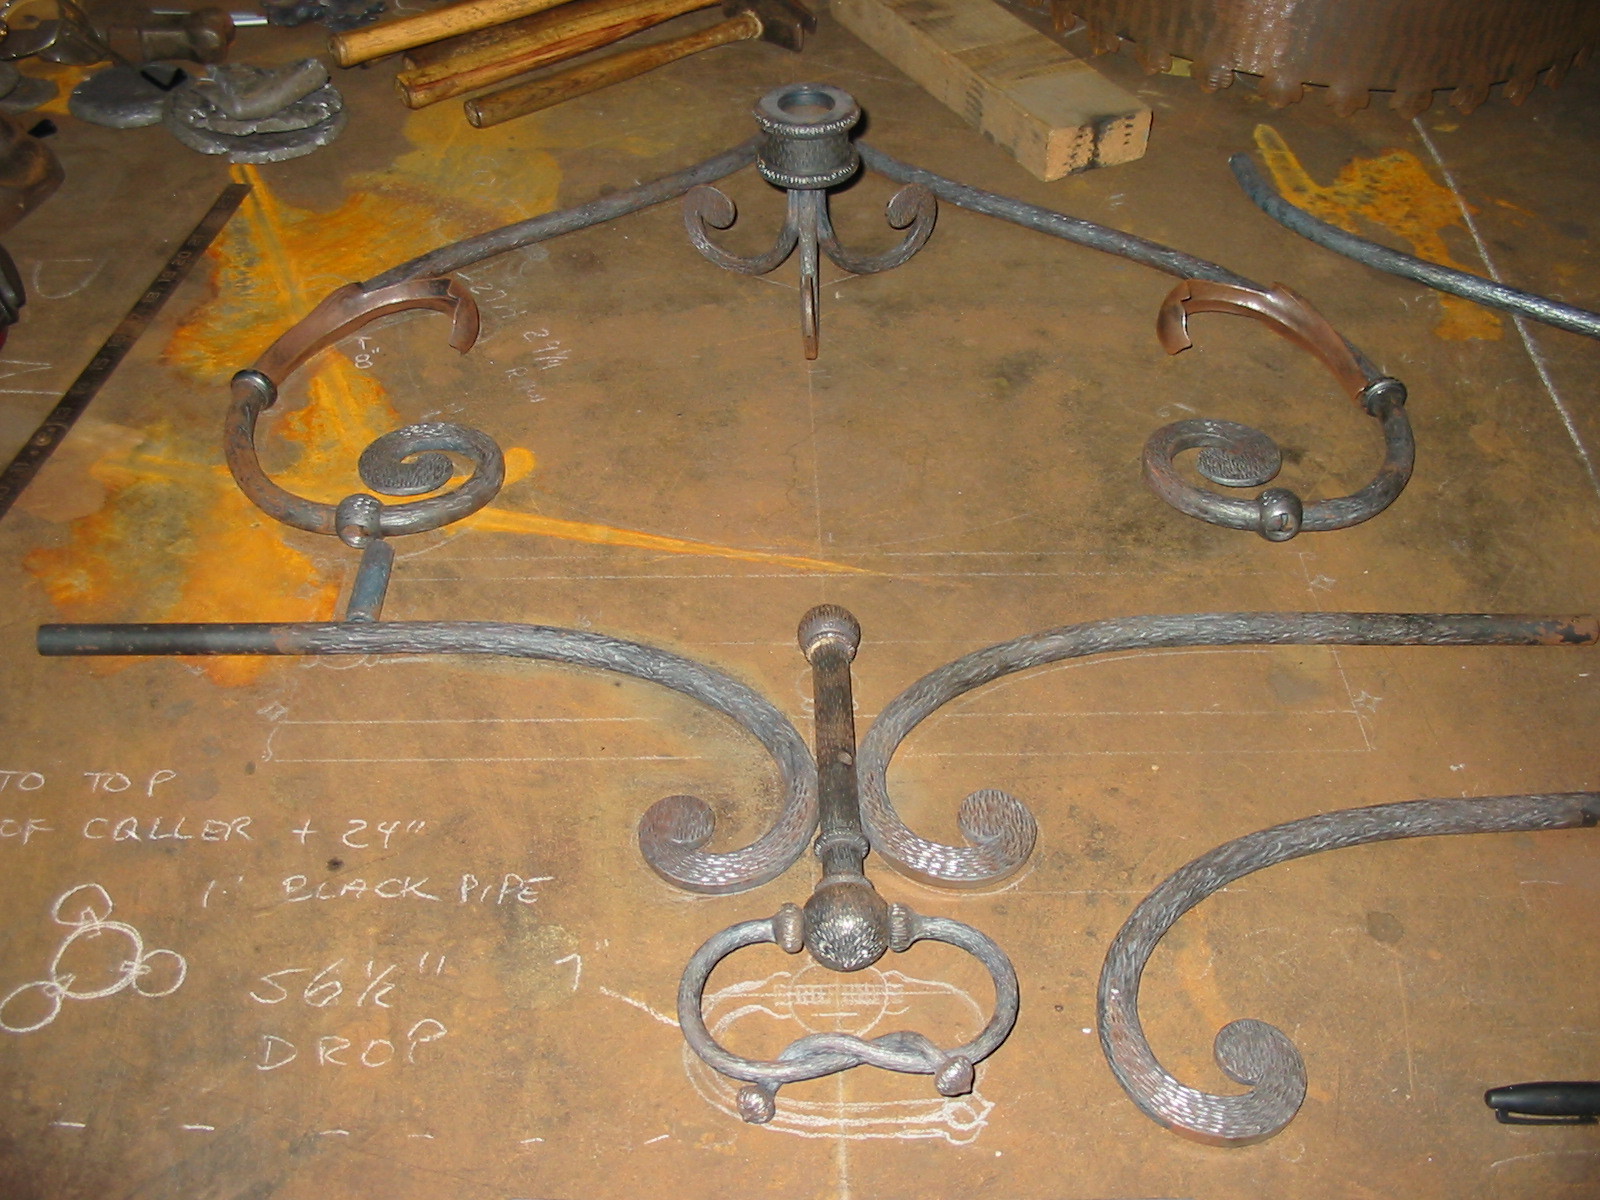
The next image shows the supporting structure of the chandelier, i.e. tubing, scrolls, ball connectors, etc.
Incidently, The original chandelier was dually fitted for both gas and electricity. I maintained the same in this construction, even though gas will never flow through this piece.
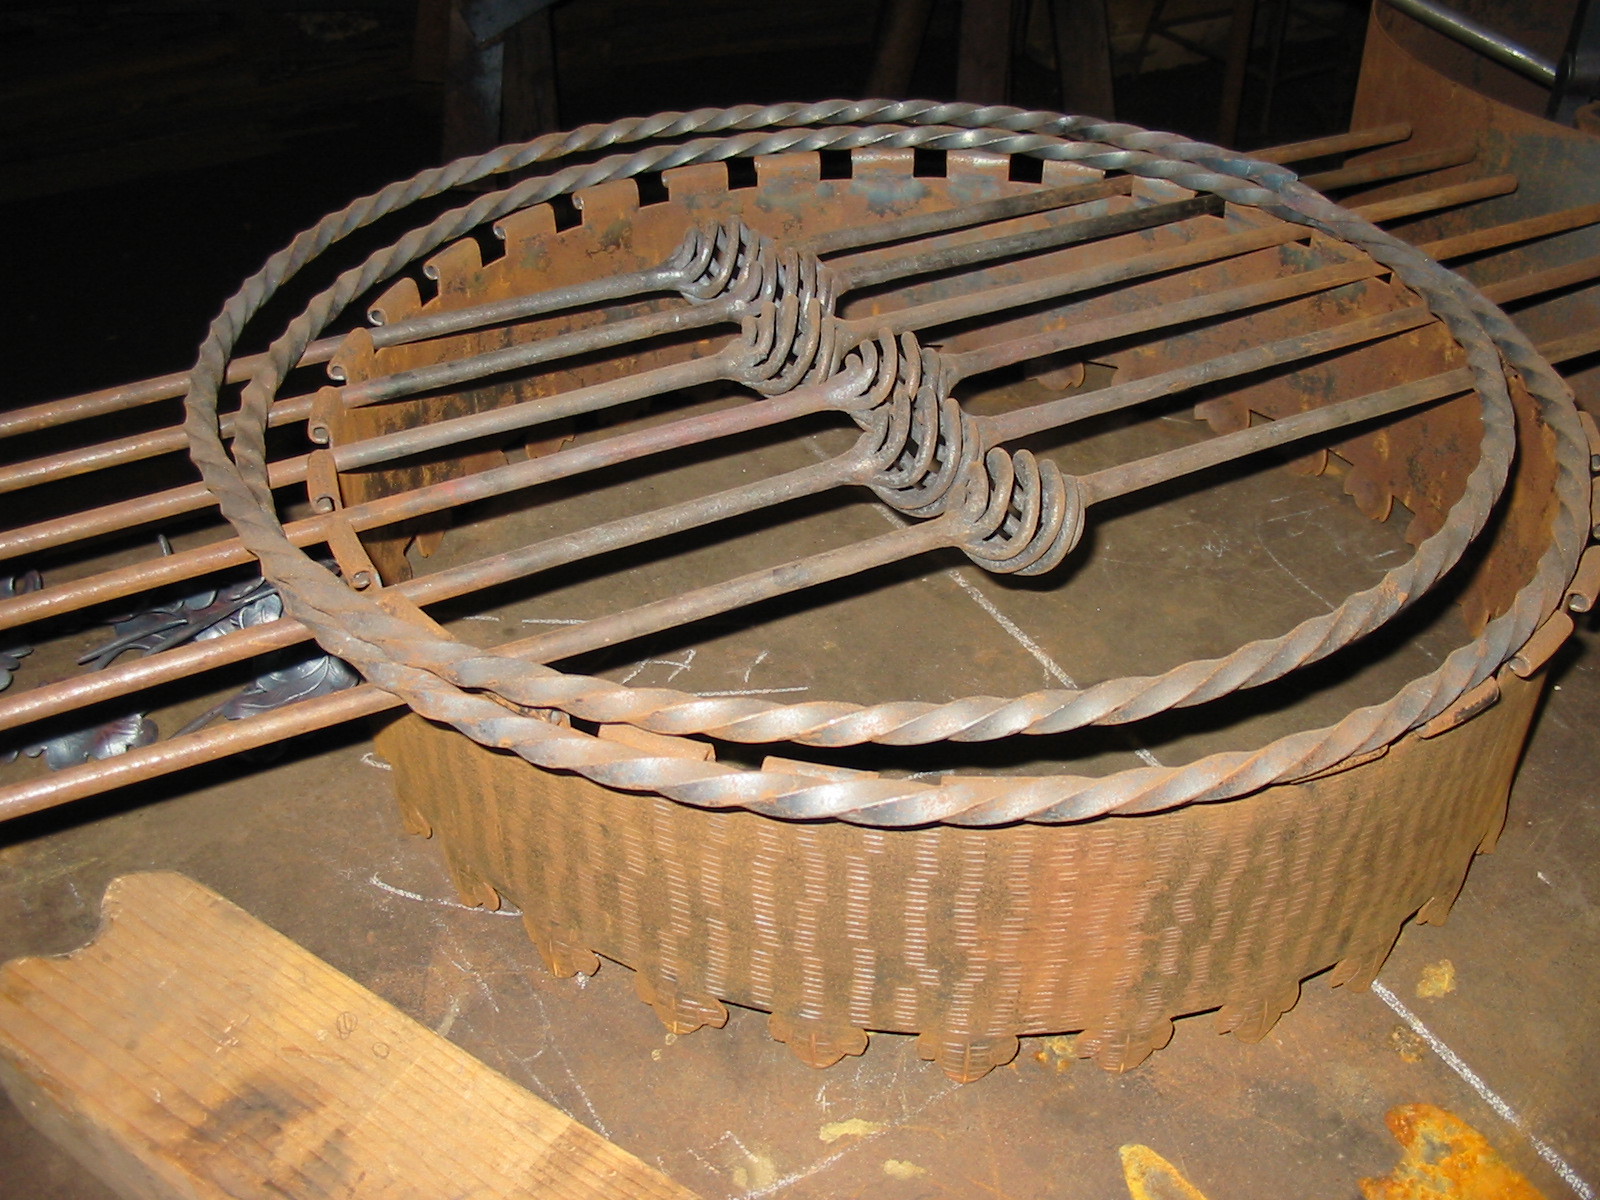
Below, we see the main ring, and its supporting links with basket twists. The details of the ring were cut out utilizing a saber saw, chisels, and then finish filed. The pattern was then rolled into a ring. The ring’s joint was welded together with an acetylene torch, and then that joint was filed smooth. The contours and scrolling of the details on the top and bottom of the ring were applied afterward.
Below we see the supporting structure after brazing it all together. This was the critical assembly, as all future elements depended on this structure for integrity and balance.

Next, tubing for the lamps, and some leaves were added.
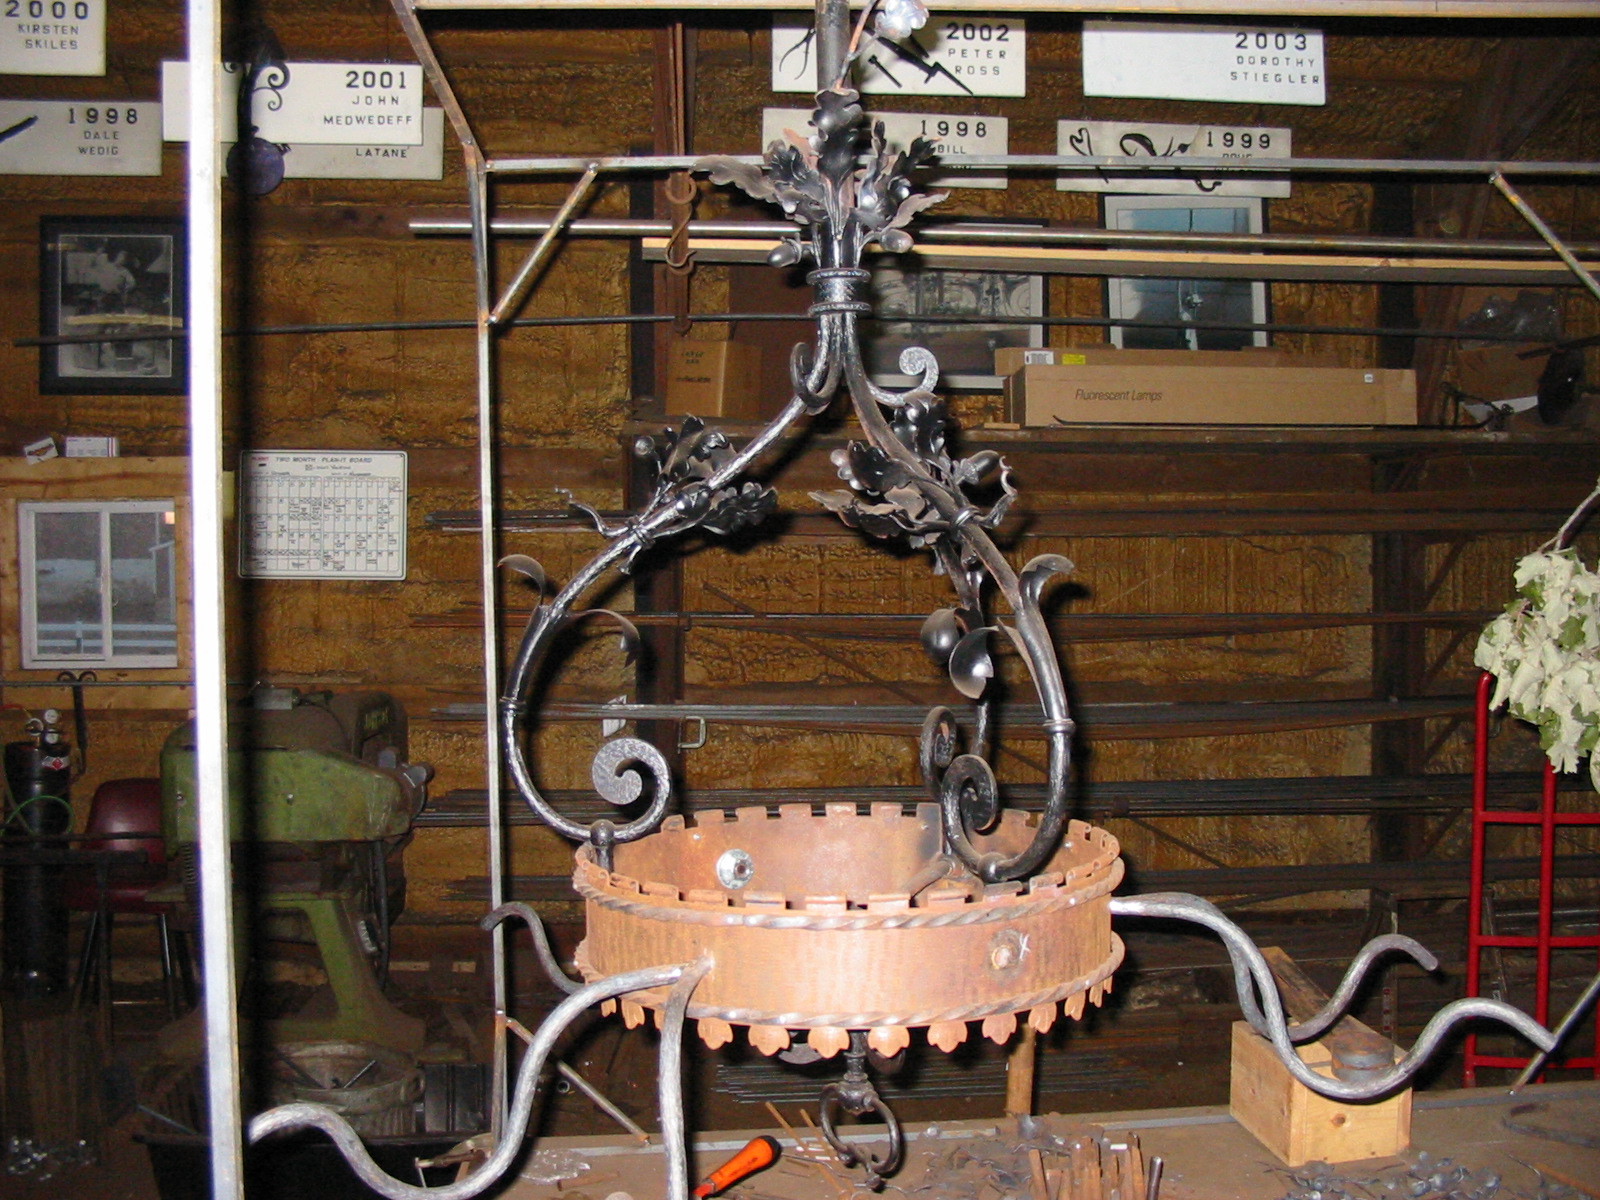
The next progression shows the addition of the elk antlers. I believe the original chandelier had antlers from a European stag, based on their shape. Since the elk and stag’s antlers are very similar, I used elk antlers, as they would be easier to find, especially when three matched sets were needed.
Note that at this point, a support structure was made to hold the chandelier while in progress.

Then, the repoussé husks and bobeches were added. These are the elements that were explained in earlier installments of this blog.

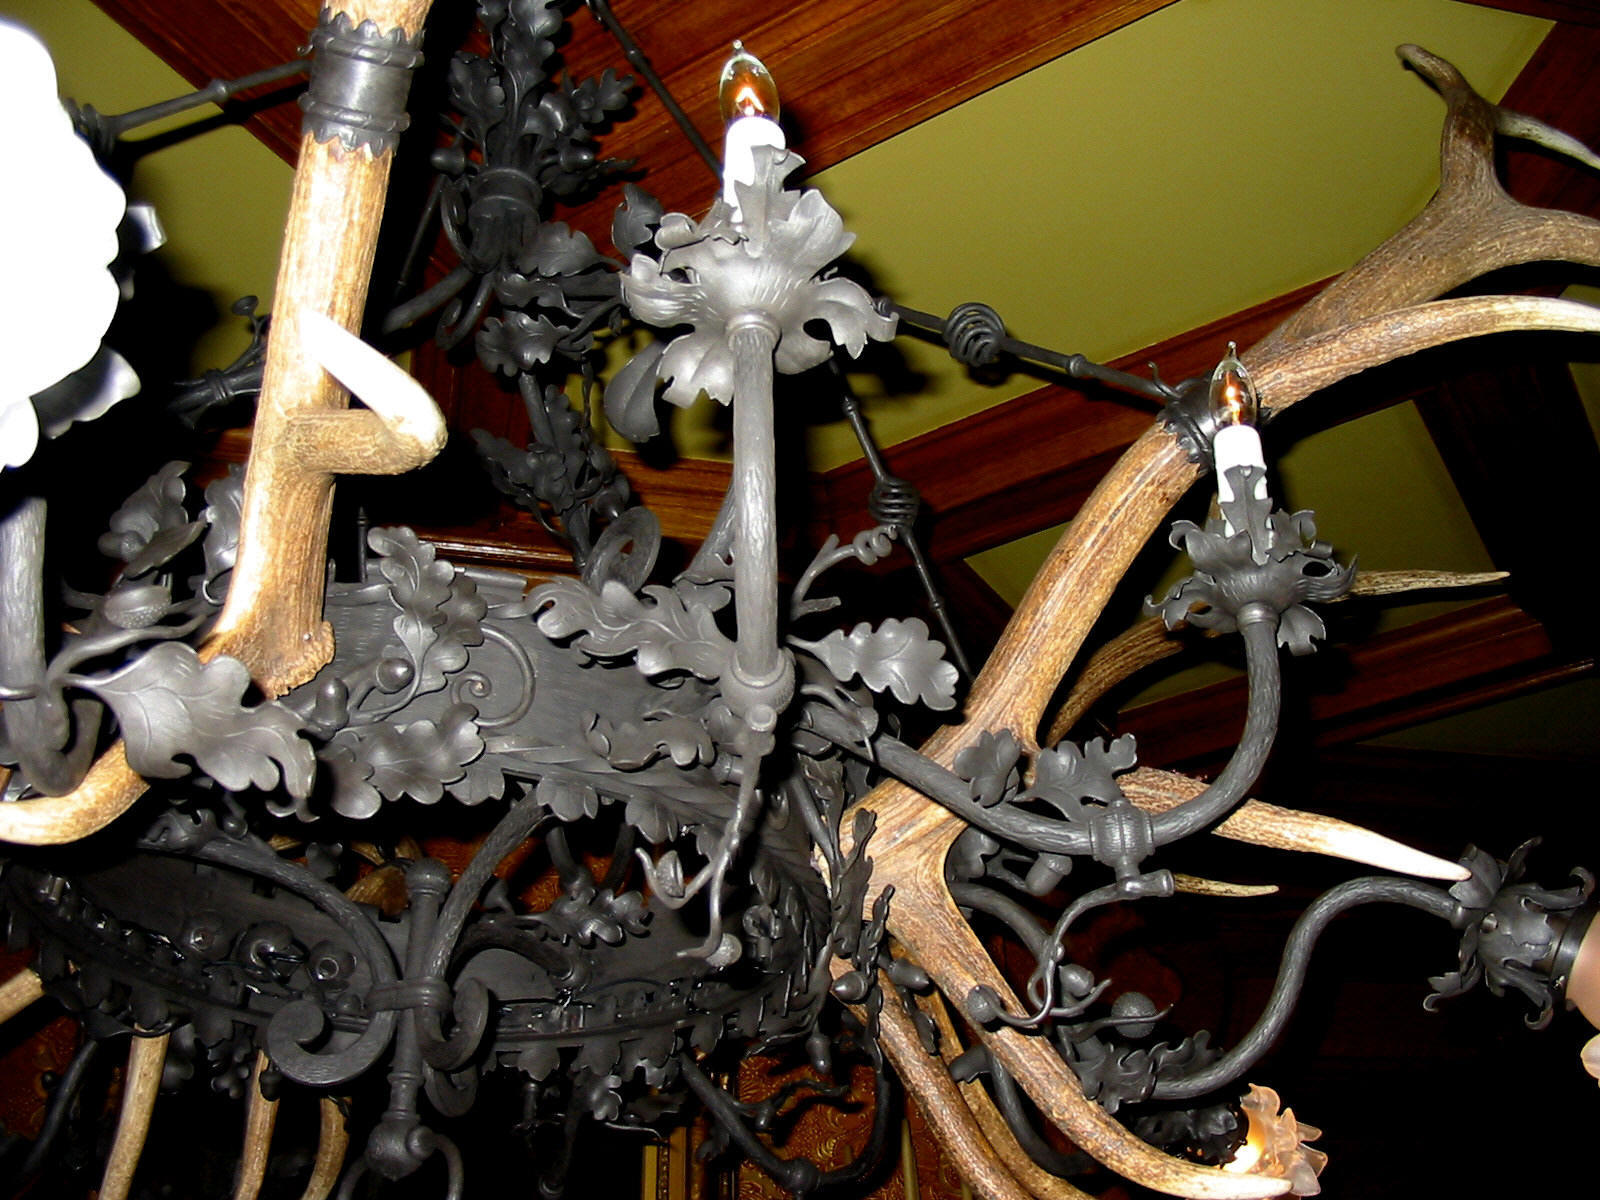
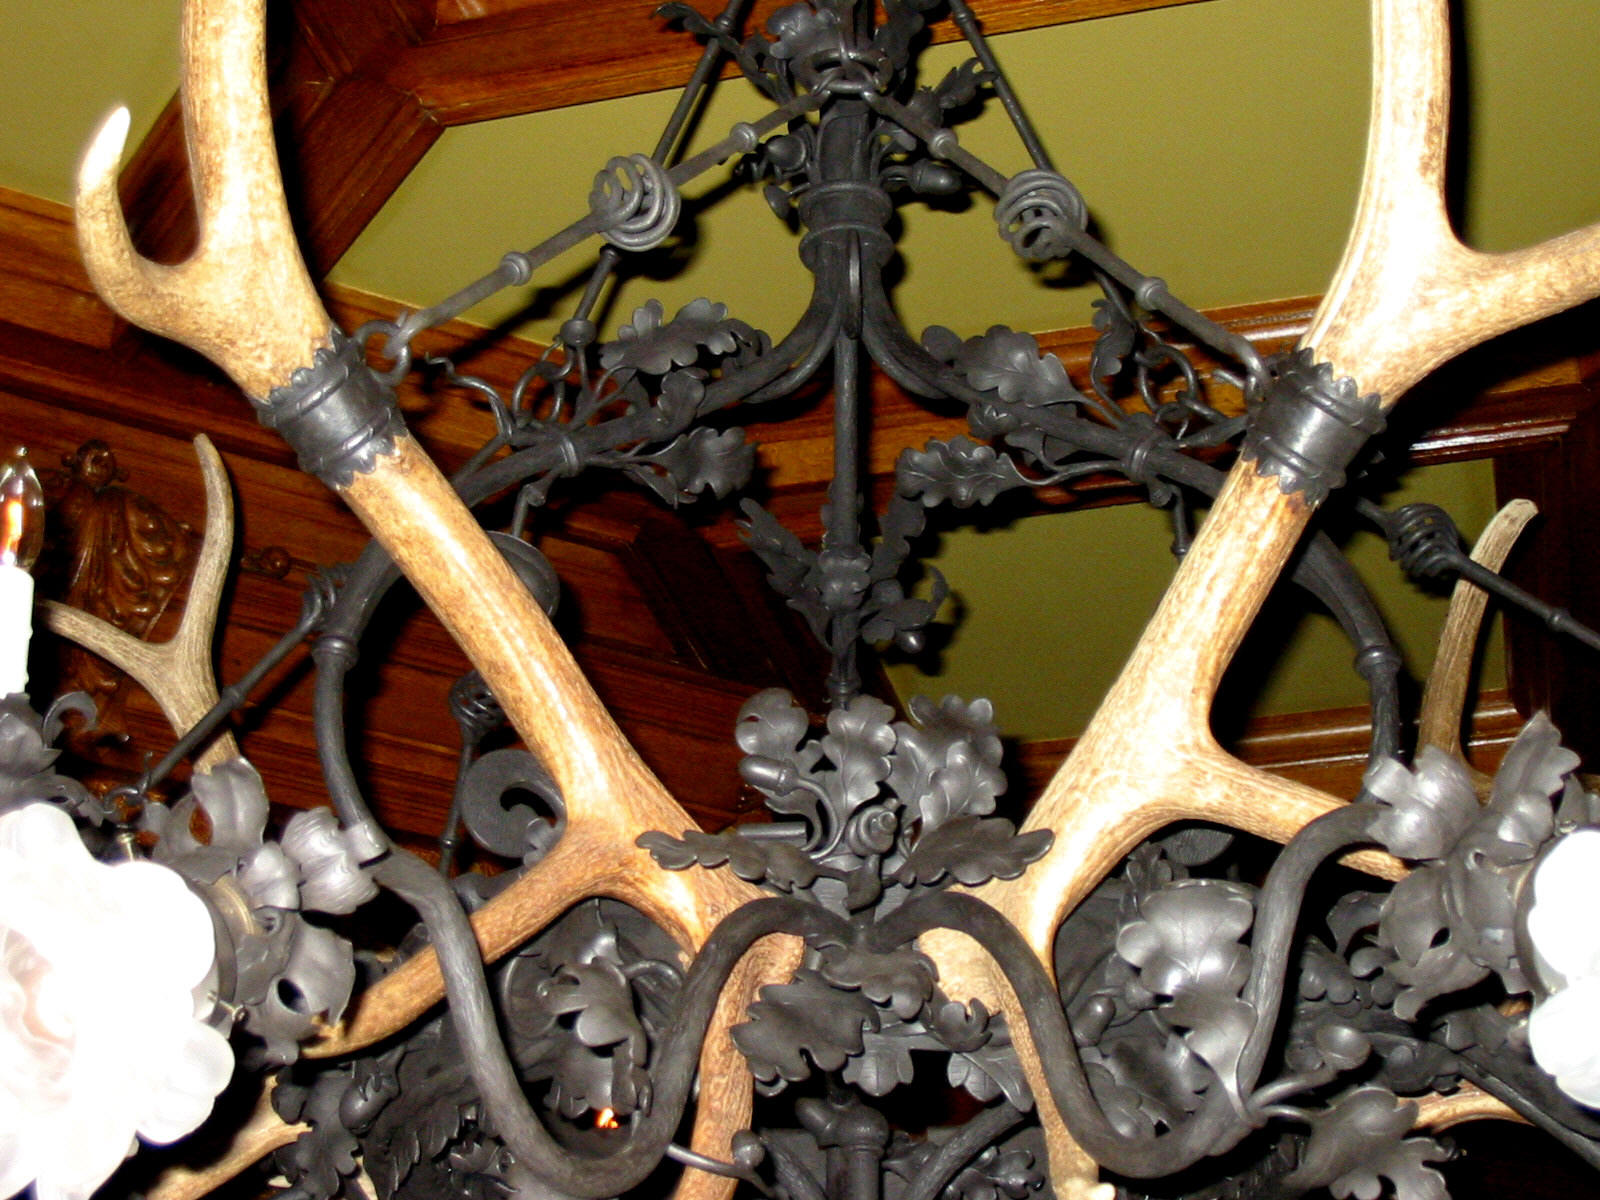
Finally, we see two detail images of the finished chandelier. You can see a finished faux gas handle and valve to the right of the first image.
The chandelier was sand-blasted, with black Gilders Paste applied for the finish.
This chandelier serves as the most challenging piece I have made thus far in my career. Much was learned while making it. I later made two complimentary wall sconces for the mansion, as the originals had also been removed by the archdiocese. They are of the same style as the chandelier, with oak leaves, acorns and tendrils. (See below.)
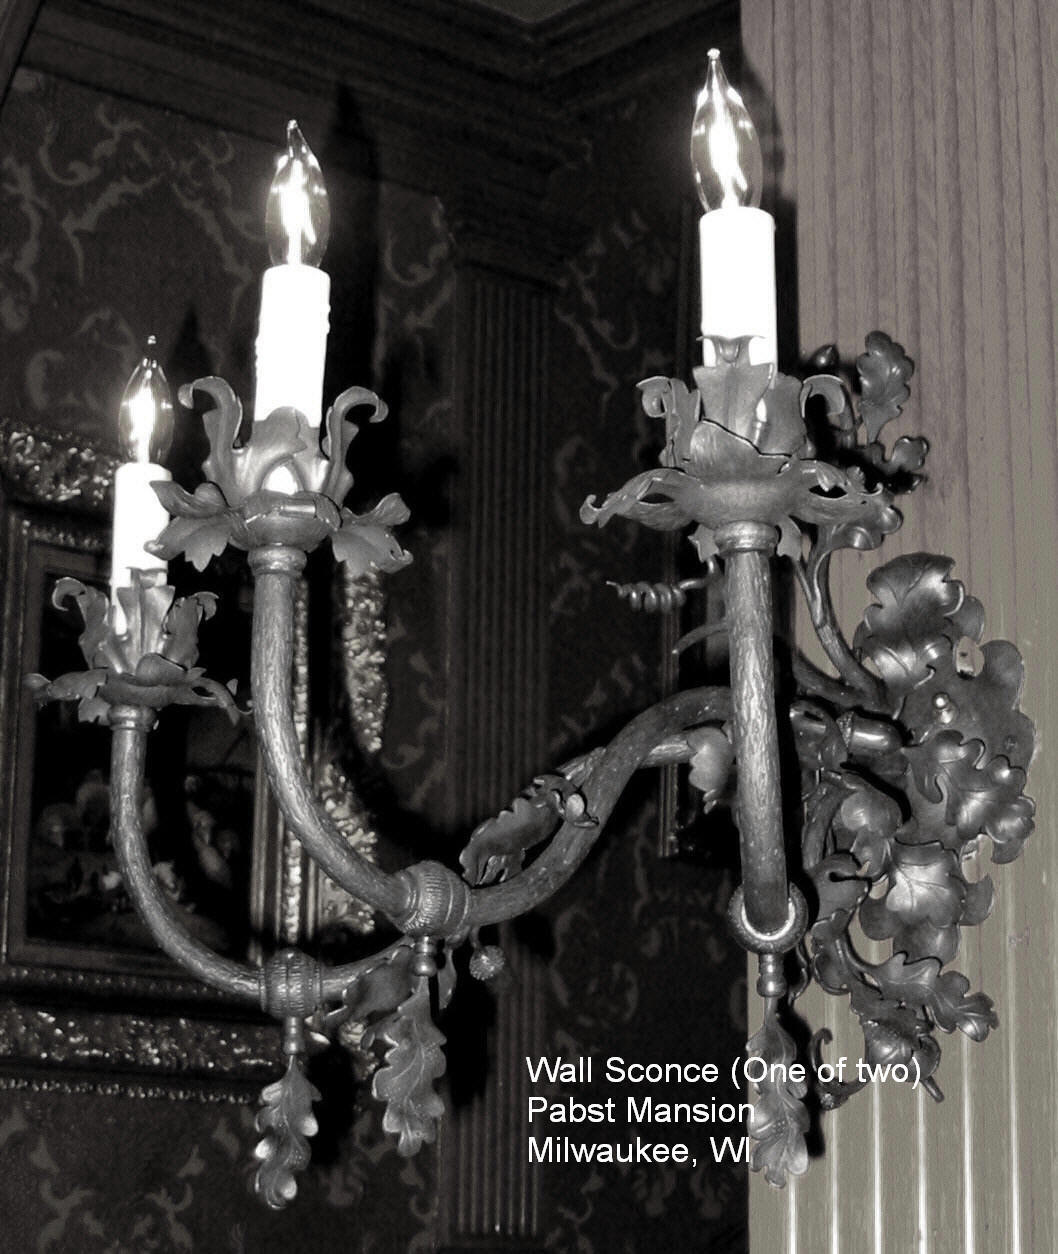
These pieces can be seen at the Captain Frederick Pabst Mansion in Milwaukee, which is a Flemish Renaissance structure, open to the public most days.
…….Dan Nauman
“You have to expect good things of yourself before you can do them.”…..Michael Jordan, Basketball player.
2 comments to “Evolution of a Chandelier”
Phil Zerkel - December 14, 2010
This is a really amazing work of art. Great job…..
bighornforge - December 15, 2010
Thank you Phil….it was one of the toughest, yet one of the most rewarding projects of my career.